
The card I’m sharing with you today was created by my lovely friend, Jenn Tinline. I absolutely LOVE it!
- Jenn used the “Power of Hope” bundle, which you can earn for FREE during Sale-a-bration.

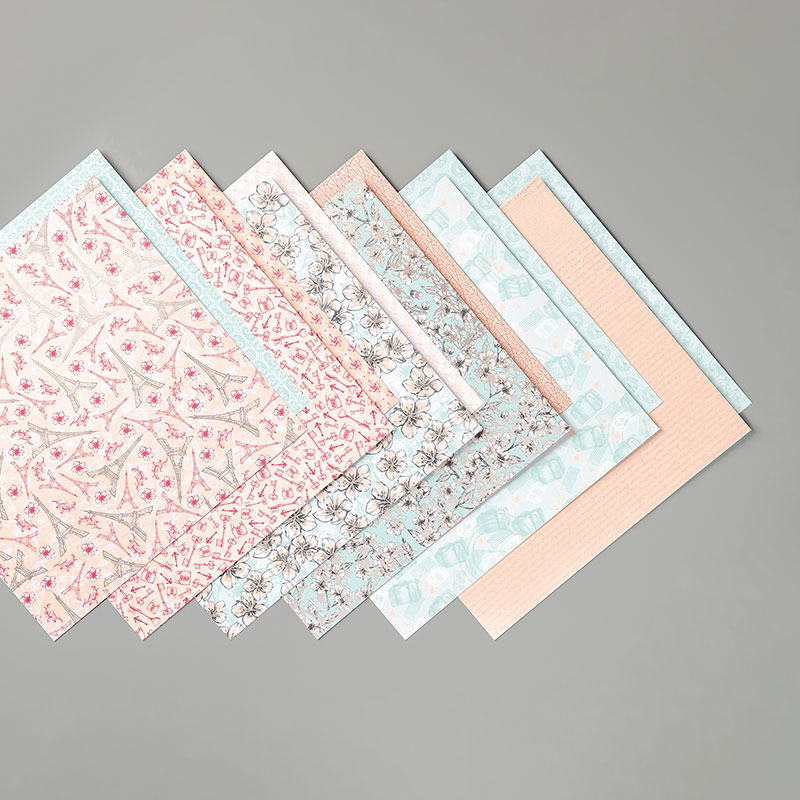
- The gorgeous Designer Series Paper, “Parisian Blossoms” is also one my favourite new products.
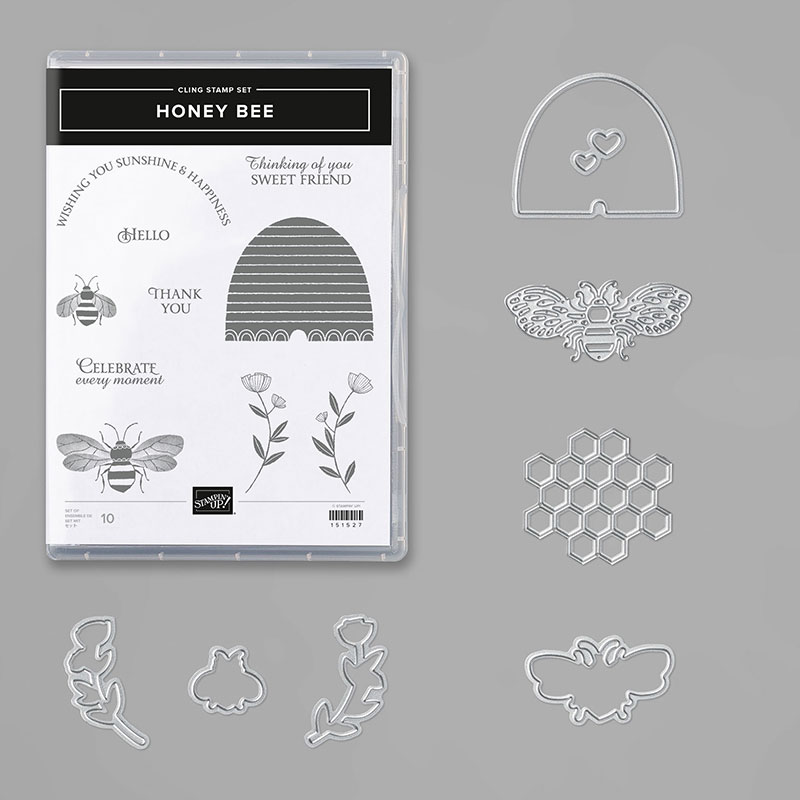
- The sentiment on the card is from a new stamp set called “Honey Bee“:
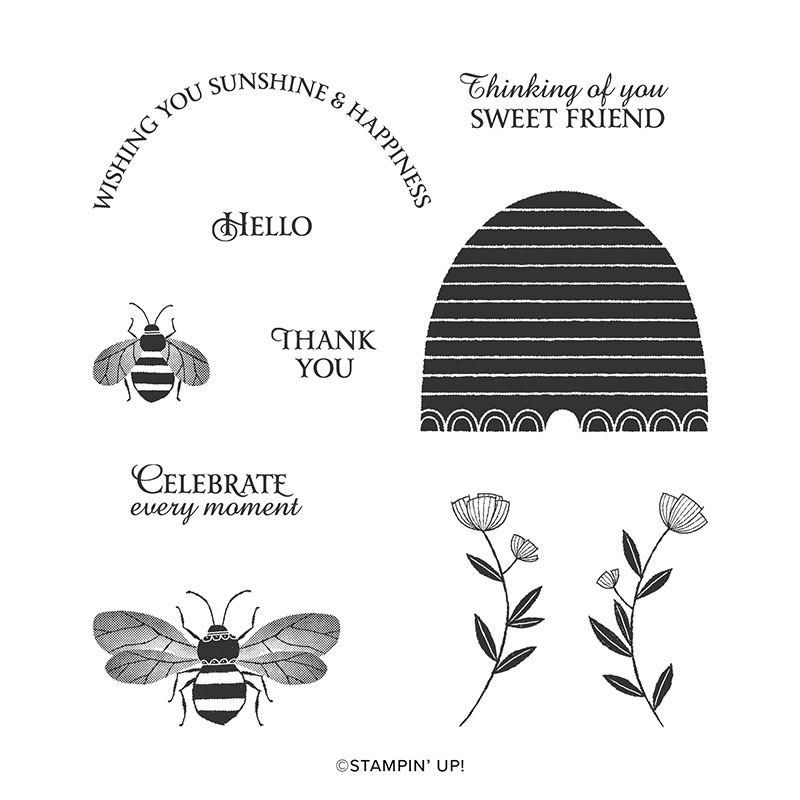
- Isn’t this set just awesome? The “Honey Bee” stamp set is also available as a bundle, with coordinating dies too!
- The “Petal Pink” metallic ribbon is new in our 2020 Mini Catalogue too. I’ve actually used this ribbon so much already, I need to buy more – it is THAT gorgeous!
When you put all of the above products together, as Jenn did, you get one heck of a beautiful card! Enjoy the tutorial!

Supplies:
-
Stamp
Sets – Power
of Hope Stamp Set (Cling 152318- Part of the Sale-a-bration Power of Hope Bundle); Honey Bee (Cling
151527) -
Card
Stock – Whisper
White Card Stock (100730);
Gray Granite Card Stock (146983) -
Stamp
Pads – Tuxedo
Black Memento Ink (132708) -
Misc.
– Parisian Blossoms Specialty Designer Series Paper (151192);
Stitched Shapes Dies (152323); Stone
3D Embossing Folder (152318- Part of the Sale-a-bration Power of
Hope Bundle); 3D Embossing Folder Plate (149658); Petal Pink ¼” Metallic-Edge Ribbon (151194); Petal Pink Combo Pack Stampin’
Blends (147272); Gray Granite Combo Pack Stampin’ Blends (149537);
Pool Party Light Stampin’ Blends Marker (144595); Champagne
Rhinestone Basic Jewels (151193); Snail (104332); Mini Glue Dots
(103683); die cutting machine.
Measurements:
-
Gray
Granite Card Stock: 11 x 4 ¼” (scored at 5 ½”)
-
Whisper
White Card Stock: 3 ½” x 3 ½” -
Designer
Series Paper: 4” x 4”
-
Ribbon:
12” and 9”
Instructions:
-
Score
the Gray Granite Card Stock at 5 ½” and fold in half. -
Emboss
the front only of the Gray Granite Card Stock with Stone 3D
Embossing Folder and a die cutting machine. You might need the 3D
Embossing Folder Plate, the blue one, to get the correct height in
the die cutting machine. -
Cut
the circle from the Whisper White Card Stock using the Stitched
Shapes and a die cutting machine.
-
Stamp
the saying, on the die cut circle, with Memento Black ink. -
Colour
the image with the Petal Pink and Gray Granite Blends markers.
Colour the sky with the Pool Party Blends marker with light wispy
strokes. -
Attach
the Designer Series Paper to the front of the card. -
Wrap
about the smaller piece of ribbon around the card front and secure
at the front with a couple of glue dots. Make sure the seam is at
the front left (where it will be covered up). -
Attach
the white circle to the front of the card with dimensionals.
-
Tie
a bow with the remaining ribbon and attach it to your card front
with a glue dot. Use glue dots to attach the ribbon strings in a
few places to make it look ruffled.

As a token of my appreciation and GRATITUDE to those of you who shop with me, FREE tutorials will be sent to you to THANK YOU for your order!

Click HERE to learn more!
Enjoy the day & HAPPY STAMPING!

Gorgeous card!😊
Thanks for your comment, Christy! I'm so glad you liked this card!