Hi Everyone! It’s been a while since I posted a tutorial, so today’s the day! I love this quick and simple card! And I LOVE my Stampin’ Write Markers!


The technique I used is called the ‘direct to rubber’ because it is just that – use your markers directly ON your stamps! This is a really great way – and one of MY favourite ways – to use these fabulous markers. Let’s get stamping, shall we?
The Cast of Characters:
Whisper White Card Stock
You are Loved Stamp Set (Holiday Mini)
Always Artichoke Stampin’ Write Marker
Riding Hood Red Stampin’ Write Marker
Pumpkin Pie Stampin’ Write Marker
Hand Penned Holidays Stamp Set (Holiday Mini)
Versamark Ink Pad
Pewter Embossing Powder NEW! (Holiday Mini)
Stampin’ Up! Heat Tool
Embossing Buddy
Clear Block E (if using clear stamps)
Clear Block Cleaning Cloth
To view all of the above items, click HERE!
Starting with the lightest colour, I used the Pumpkin Pie marker to colour the roses.
Next, I took the Riding Hood Red marker and just ‘scribbled’ it here and there, over the pumpkin marker on the roses. This is how I will achieve the dual-coloured roses!
I used the Always Artichoke marker for the leaves and stems. By the time I’ve finished colouring the entire image, some of the marker will have dried. Simply ‘HUFF’ on the marker – your breath is enough to re-moisten the ink. I actually have a photo of me ‘huffin’ on my stamp, but decided you didn’t really need to see that….LOL
Press the stamp firmly onto the whisper white card stock. Don’t wiggle or rock the stamp from side to side – this is why some images looked smudged and blurry. Lift straight off the paper.
Always my favourite part.. the ‘reveal’!
Ta-da! Look how pretty that is!!
Ok – next step. We’re going to emboss the expression. So take your embossing buddy and wipe over the card stock. This removes any static off the paper so that your embossing powder only sticks to your stamped image.
I always wipe my clear blocks with the cleaning cloth to ensure all oils and residues, fingerprints, dirt (yup – it can get messy in this here hobby room!) are off so that my clear rubber image will have a good hold on the block. If your stamp falls off then wipe the clear block with water first, then dry with the cloth. This works great for me every time and my stamps always stay stuck to the clear blocks.
Using the ‘With Love’ sentiment from the new Hand Penned Stamp Set, ink it up with the Versamark Ink Pad. (I know, I know – I got the camera’s cord in the photo…what can I say? LOL)
Stamp it on to your card.
Versamark is a CLEAR ink pad – it’s a pigment based ink and today we’re using it to emboss. We can do this because pigment ink doesn’t dry as fast as our Classic Ink Pads and it’s also a ‘tackier’ ink, which is what the embossing powder will stick to.
Sprinkle on the new Pewter Embossing Power. I love this colour!
Shake off the excess powder (I’m using the Stampin’ Up! Powder Pals – love them! Makes life so much easier! Just pour the powder out of the spout and back into the tub! Ready for the next time you use it! No mess, no fuss!)
This is what your image will look like prior to heating it up.
Use the heat tool to heat the embossing powder. Don’t go too close to the paper or you’ll end up scorching it. Unless, of course, that’s the look you’re going for…. *wink*
WOW! Embossing never ceases to WOW me!
And here’s the completed card! This card only took me about 5-10 minutes to make!
Add any sentiment, change the colours of the roses and imagine all the different cards you could make for ALL occassions, using these simple techniques! I LOVE STAMPING! It’s so much FUN!!! Speaking of cards and occassions, I have some thank you cards that I must go and mail…
…have a marvelous day and HAPPY STAMPING!
Love
PS – Want to learn MORE techniques? Join my stamping group! We meet once a month and make two cards and one 3-D project! I provide all of the supplies required (you just need to bring your own adhesive). You’ll also receive a FREE catalogue, FREE technique booklet and FREE Stampin’ product of your choice (a min $35!)!!! All you need to do is commit to spending $36/mth (build your stampin’ supplies on a budget!) and I’ll do the rest!!!! CONTACT ME FOR DETAILS! You’ll be glad you did! serenestamper@yahoo.ca
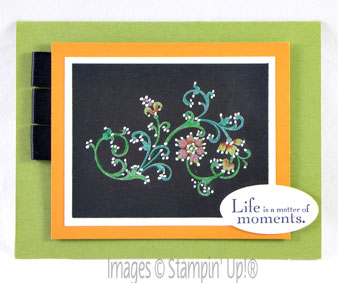
Here are some examples of techniques I demonstrate in our Stamping Groups:
I even have a SCRAPBOOKING GROUP!
You deserve a fun girl’s night out!
Contact me today and be my GUEST at Stamp Group and receive one FREE class pass!!!
Leave a Reply