• Skip to secondary menu
  • Skip to main content
  • Skip to primary sidebar
  • Clearance Rack
  • Product Suites
  • Bundled Savings
  • Kits & Subscriptions

Tina Zinck, Stampin' Up! Demonstrator

Teaching others the art of stamping and paper crafting. Let me show you how to use the exceptional products from Stampin' Up! and all the different ways you can create with them!

  • Home
  • Events
  • Gallery
  • Videos
  • Shop Tutorials
    • My account
    • Checkout
  • Shop Stampin’ Up!
    • Shop My Online Store!
    • Latest Catalogue(s)
    • Current Specials
    • 🌟My Customer Appreciation Gift 🌟
  • Join the fun
    • Sign Up Online!
  • Recipes
  • About Me
    • Contact
  •  

Glittery Framed Snowman

November 28, 2013 Leave a Comment

 Holiday Sale Up to 50% Off!


MDS Seasonal Sale


New Arrivals

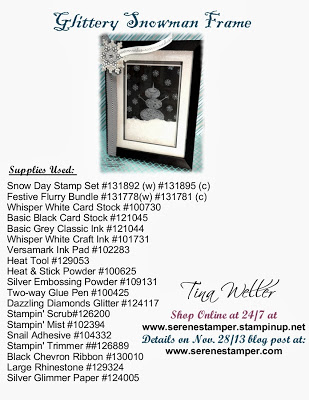
Hi Friends!  Oh wait until you see what I’ve got in store for you!  Today’s project is one I created a couple of weeks ago and I was thrilled with how it turned out.  What could be better than an adorable little snowman looking up at the falling snow?  And let’s not forget about the glitter – and LOTS of it!  This project would make a sweet Christmas gift for all your snow-lovin’ friends and family.  Just get your hands on some frames (make sure there’s a mat inside) and you’re ready to rock and roll!

Directions:

  1. Take frame apart (I used a 7″ x 9″ frame with matting for a 5″ x 7″ photo).  Ink up mat with Versamark and sprinkle Heat & Stick Powder over top.  Shake off excess and set with Heat Tool.  Pour Dazzling Diamond Glitter over the Heat and Stick and tap off the excess.  Caution:  extra glitter may get on your clothes, in the air, stuck to your skin, etc.  Personally, I think this is a good thing.  My husband, however, does not.  😉  Place the mat back into the photo frame.
  2. Cut a piece of Basic Black Card Stock to measure 4″ x 6″.  Using the “Snow Day” stamp set, ink snow man well with Whisper White Craft Ink and stamp onto black card stock, not quite half way up the page, leaving room for the ‘snow’. Stamp carrot nose, arms and snow flakes, again using Whisper White ink. 
  3. Make sure Whisper White ink is dry and stamp buttons and mouth on snowman, using Black Stazon ink.
  4. Cut a piece of Whisper White Card Stock to measure 4″ x 3″ and tear along the 3″ edge (hint: always tear towards you). Cover with Versamark, Heat & Stick and Dazzling Diamonds Glitter, as in step #1.  Adhere to black card stock. 
  5. Use Two-Way Glue Pen and Dazzling Diamonds Glitter on snowflakes.  
  6. Mount black card stock to a piece of 4 1/8″ x 6 1/8″ Whisper White.  Then adhere that to a piece of Basic Grey card stock to 5″ x 7″.  Put inside of frame.
  7. To finish: tie a piece of Black Chevron Ribbon around frame, tie in knot.  Use the Festive Framlit bundle to make snowflakes (I cut one out of Silver Glimmer Paper and the smallest one was heat set with Silver Embossing Powder).  Use Stampin’ Dimensionals to adhere snowflakes together and place a Large Rhinestone in centre of top snowflake.  Hot glue snowflake to ribbon.  Stamp the “Warm Wishes” sentiment from the “Snow Day” stamp set on Whisper White card stock, using Versamark ink.  Cover with Silver embossing powder and heat set.  Follow shape with scissors to cut into a banner and tuck in between snowflakes and adhere.  You’re done! Sit back and marvel at your adorable holiday creation! 
Click to enlarge.
Click HERE to Shop at my Online Store!

Happy Stamping!

post signature

Pin
Share
Tweet
Share
0 Shares

Filed Under: Miscellaneous Tagged With: 2013 Seasonal Celebration, Christmas, gifts, Snow Day

I joined Stampin' Up! the first night they arrived in Canada, April 2002, and what a ride it's been! At the time I just wanted the discount on all of the fabulous stamps and accessories - why pay full price if you don't have to, right? But little did I know where my journey with Stampin' Up! would take me. Read More…

Reader Interactions

Leave a Reply Cancel reply

Your email address will not be published. Required fields are marked *

Primary Sidebar

WELCOME!

Nova Scotia, CANADA

Tina Zinck

Stampin' Up!© Independent Demonstrator

Contact Me!

Creative Watercolour Pencils Workshop

Lifetime access. Easy to follow. Instant download.

Check out my Creative Watercolour Pencil Workshop!
This class has already helped so many stampers fall in love with their pencils again — and the results are absolutely stunning!

Click to subscribe to my newsletter
Shop

SEE MORE PRODUCTS ONLINE!

View our Annual Catalogue Online!

Stampin' Up! Annual Catalogue

View our Mini Catalogue

Stampin' Up! Mini Catalogue

2025 Scrapbooking Brochure

Stampin' Up! Scrapbook Brochure

  • Email
  • Facebook
  • Instagram
  • Pinterest
  • YouTube

Archives

Categories

My Stampin’ Up! Achievement Awards

#3 in Canada
#6 in Canada
#12 in Canada
Disney’s Grand Floridian Resort & Spa 2025
Hotel Xcaret México 2024
#2 Leadership (CANADA)
#10 Top Demonstrator (CANADA)
2023 Incentive Trip
2023 Team Building
2023 Annual Sales
2023 Leadership
2022 Incentive Trip
2022 Annual Sales
2022 Team Building
2021 Platinum
2021 Team Building
2021 Top Performer
2021 Incentive Trip
2021 Team Building
2021 Leadership
2021 Annual Sales

2020 Stampin’ Up! Achievement Awards

Stampin' Up! 2020 Awards

Stampin’ Up! Founder’s Circle Achiever

Stampin' Up! Founder's Circle 2013
Stampin' Up! Founder's Circle 2014

Struggling in Direct Sales?

See How I Built a Business That Works!

After years in direct sales, I found myself working harder for less. Sound familiar? I knew there had to be a better way. Now, I’ve built a profitable online business that runs on my terms—without inventory, parties, or chasing sales.

💡 Curious how it works? Click the image now to learn more!

Try Constant Contact 30 Days Free

Try Constant Contact 30 Days Free
Disclaimer

This is my personal blog and I am responsible for its content. Stampin' Up! does not endorse the use of or contents of the classes, services, or products offered here. All of my own ideas & creations are © Tina Zinck. Should any item be "cased" then proper credit will be given to the creator of that item.

Site designed & maintained by WebsByAmy, LLC