Hi friends! I had planned on creating a journal and filming it today, but… change of plans! After sharing a wedding box I made on my Serene Stamper Facebook page, there were quite a few requests for a tutorial — so of course I was happy to do just that. Tea-stained fingers and all! (I can’t wait to use those dyed papers in my journal making.)
There’s something so special about giving a handmade card — and I think it feels even more meaningful when it’s presented in a box that’s just as thoughtful.
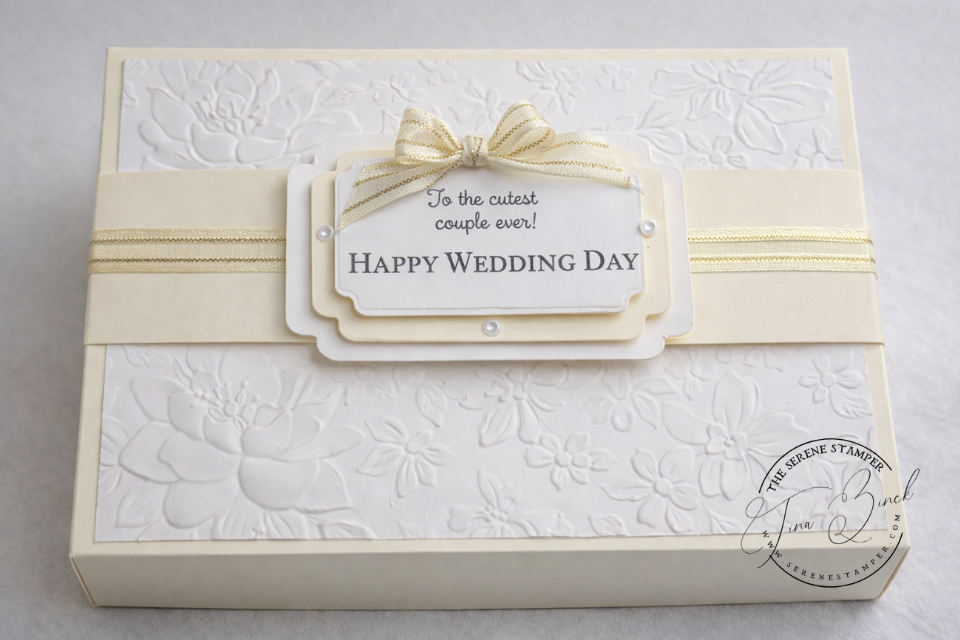
Today I’m sharing an elegant card box that’s designed to hold a standard 6″ × 4″ card, even if you like a little dimension with pearls, ribbon, or layered embellishments. This is one of those projects that looks far more complicated than it actually is, and once you’ve made one, you’ll find yourself coming back to it again and again.
I originally created this box to help a friend who was looking for a way to present a special wedding card she had made, but the design itself works beautifully for any occasion — weddings, anniversaries, sympathy cards, milestone birthdays, or keepsakes for someone special.

Why I love this box design
- It fits a 6″ × 4″ card comfortably, even with embellishments
- The lid slides on neatly without wobbling
- The belly band keeps everything secure but removable
- It’s sturdy, elegant, and easy to customise
Best of all, the measurements are simple and repeatable, which makes this a great project to keep in your “go-to” file.
Finished size
Inside box size (base):
6 1/4″ × 4 1/4″ × 1″
That little bit of extra space allows the card to slide in easily without catching on embellishments — something I really appreciate after putting time into a handmade card.
A simple scoring tip
For both the box base and the box lid, you’ll always score:
1 inch in from all four sides
If eighth-inch measurements feel fiddly, don’t worry. The cut size determines the fit — the scoring stays the same every time. I like to think of it as creating a 1-inch frame on your cardstock.
Helpful tip: For the 3/8″ measurement, I found it much easier and more accurate to score this on the scoreboard rather than the paper trimmer, especially if your trimmer handle covers the measurement markings.
Decorating the box
I’ve finished this box in a soft, elegant style using embossing, pearls, and a simple layered sentiment, but this design is incredibly versatile.
Once the box is made, you can:
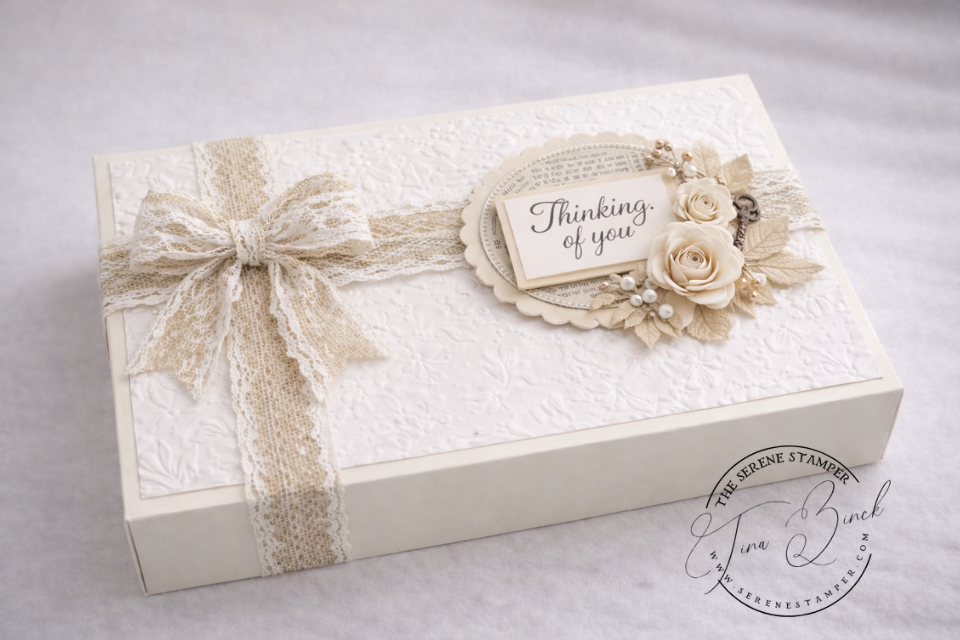
- Change the sentiment for different occasions
- Use embossing folders, lace, or ribbon
- Keep it simple or dress it up — whatever suits your style
When you watch the video, you’ll also see how easy it is to adapt this box once you understand the basic construction.
Printable PDF tutorial
I know many of you like to have measurements printed and ready to go, so I’ve created a printable PDF with all the sizes and steps laid out clearly.
👉 Download the printable PDF here:
If you’d like to see the box come together step by step, you can watch the full video tutorial here:
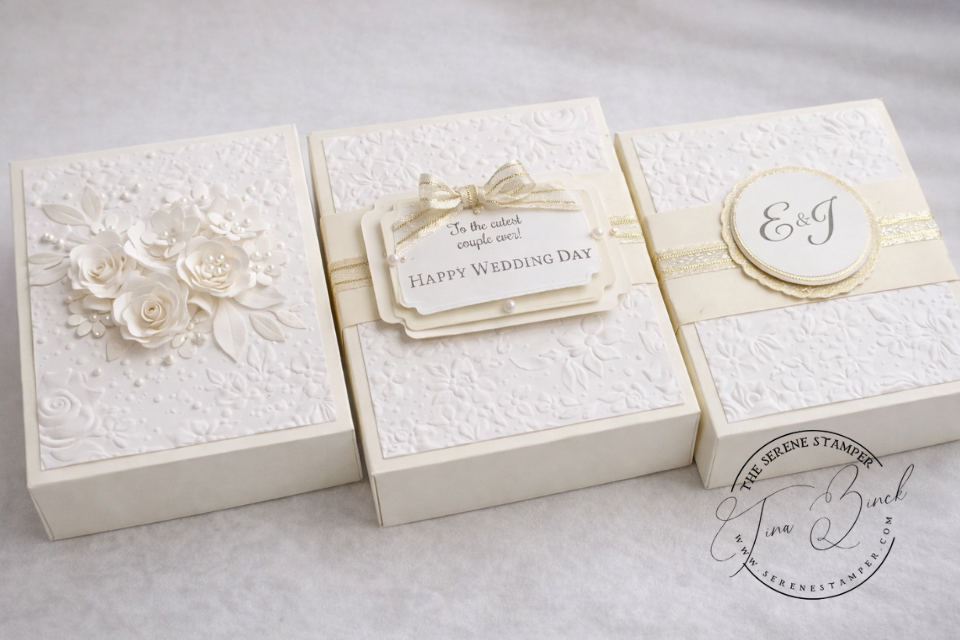
Decorating ideas using the same box
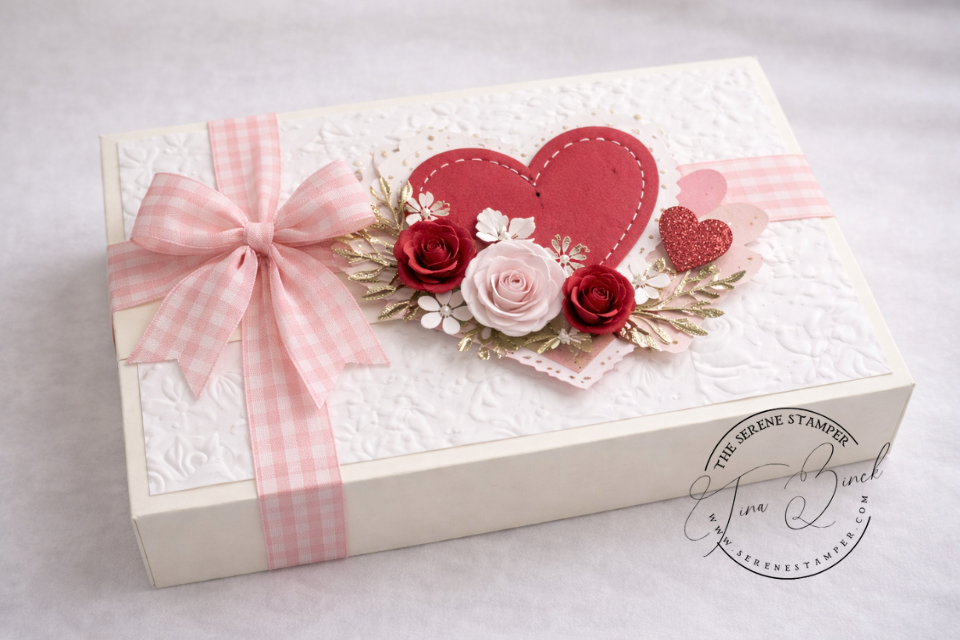
Once you know how to make the box, the fun really begins. The top can be decorated in so many different ways depending on the occasion or your personal style.
Here are a few decorating ideas to show how versatile this same box design can be. Think of these as inspiration you can adapt using what you already have.
I hope this box gives you a lovely way to present your handmade cards and adds something special to your gifting. It’s easy to make and SUPER FUN to decorate – I think you’ll really enjoy making this box again and again!
Until next time, take care and HAPPY STAMPING!

Leave a Reply