Hi Friends! I hope you had a nice weekend! I spent the entire weekend in the kitchen, making salsa, dills, bread & butter and sweet pickles & beets! So much work, but it’s worth it, in my opinion. I’ve got a bit more to do yet, but I’m getting close to having my canning finished for the season. I’m not planning on having a vegetable garden next year (because I’ll be too busy with wedding stuff) so I’m hoping everything I’m making now lasts until the following season!

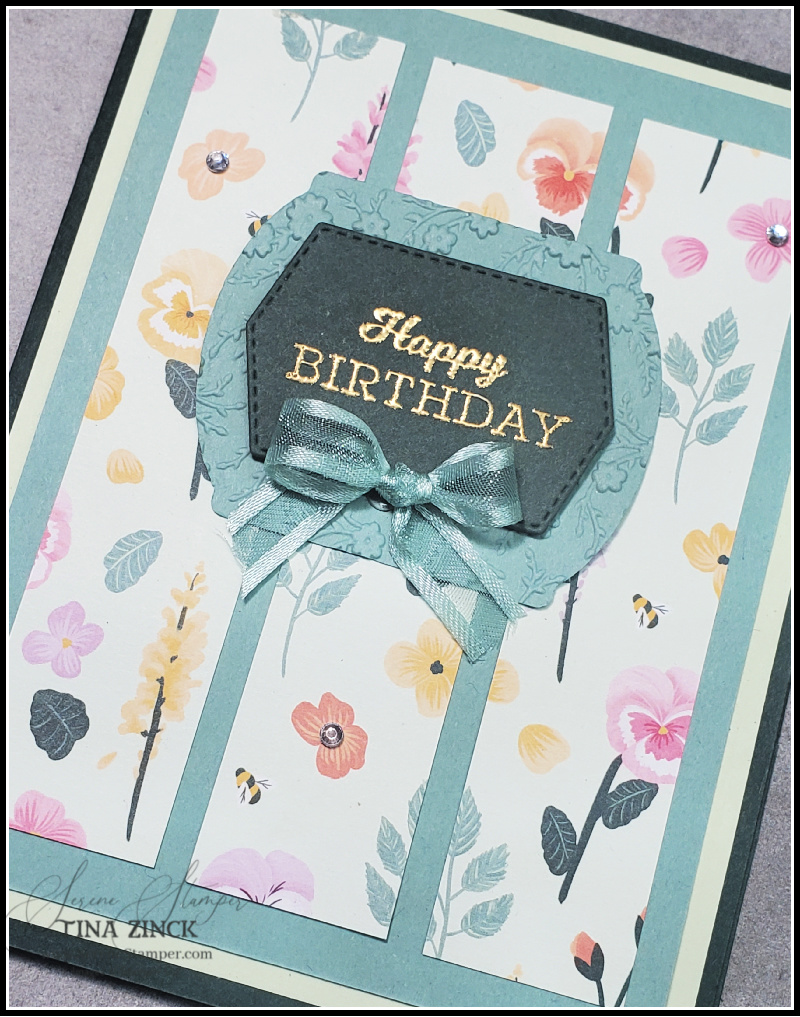
Today I’m sharing my card and tutorial from my “Mystery Stamping Hour” on Friday. It’s a simple layout but I love it! I used the “In Your Words” stamp set, which is a Host Only set from Sale-a-bration:

I wish this set were in our annual catalogue because it’s absolutely fabulous! However, there is still time for you to get it for free with a qualifying order (Sale-a-bration ends Sept 30th).

In Your Words Card
Measurements:
- Evening Evergreen: 8 ½” x 5 ½”, plus scrap piece for sentiment
- Soft Sea Foam: 4” x 5 ¼”, plus scrap piece for label
- Soft Succulent: 3 ¾” x 5”
- Pansy Petals Designer Series Paper: 3” x 4 ½” (cut into three 1” strips to measure 4 ½” x 1”)
Instructions:
- Score the 8 ½” x 5 ½” Evening Evergreen card stock at 4 ¼” and fold in half to create card base.
- Glue Soft Sea Foam card stock to front of card.
- Glue Soft Succulent card stock to front of card.
- Glue the three strips of Designer Series Paper to front of card, approx. 1/8” apart, and keeping the design sequence of the paper the same.
- Stamp sentiment with Versamark onto scrap piece of Evening Evergreen. Sprinkle gold emboss powder on top, shaking off excess, and set with heat tool. Cut with die.
- Cut a scrap piece of Soft Succulent card stock with die to layer behind the sentiment. Run through embossing folder. Adhere together with Stampin’ Dimensionals and place on front of card.
- Add a ribbon bow, securing into place with Mini Glue Dots.
- Add rhinestones as desired.
- Stamp and emboss sentiment for inside of card, layering onto Soft Succulent die cut.

Enjoy the day & HAPPY STAMPING!


Leave a Reply