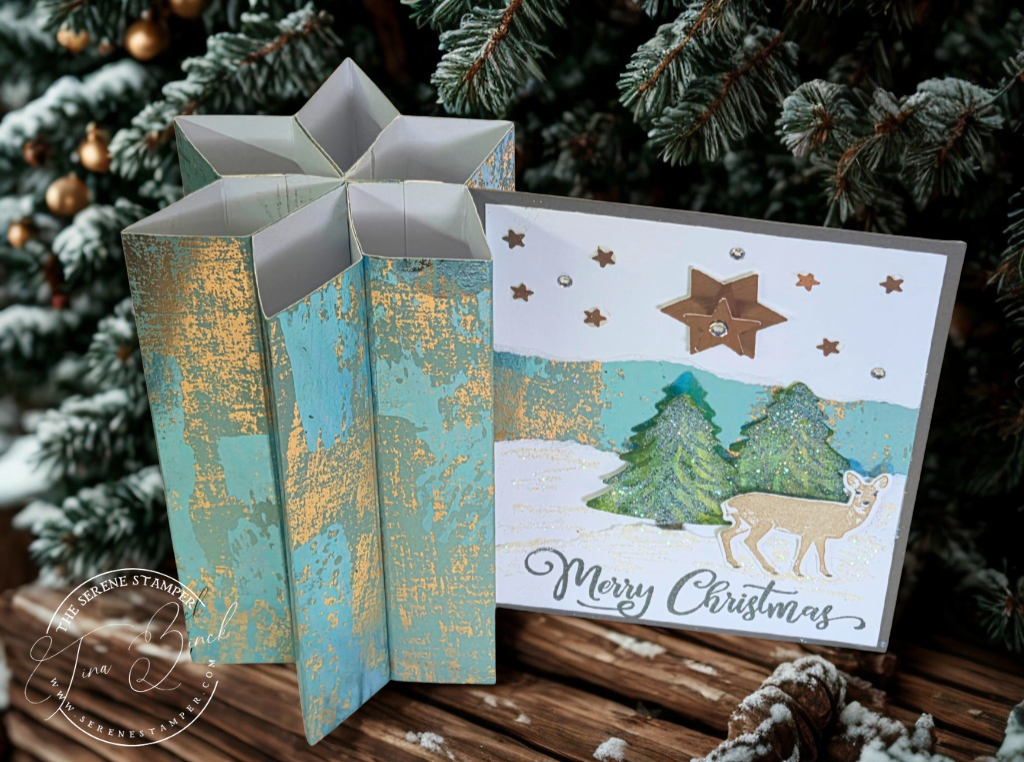
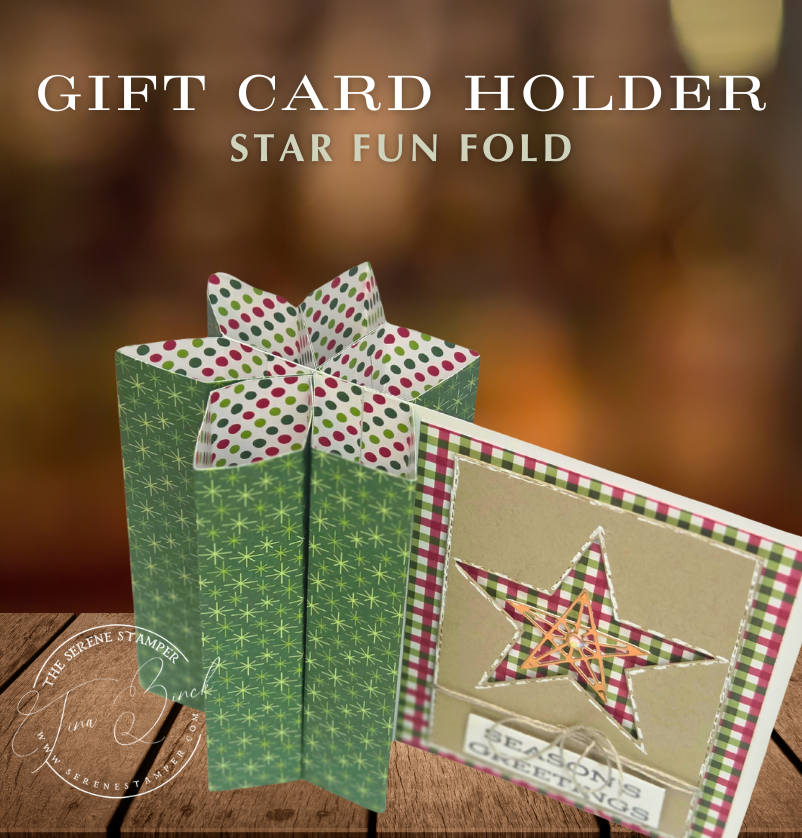
Hi Friends! Today I’m excited to share a really fun fold that’s a definite wow: the Star Funfold Card! I’ve made eight different versions, each with a slightly different twist, and they all look amazing. Whether you prefer larger 5″ x 7″ cards or the standard A2 size, this fold works beautifully for any occasion.
✂️ Star Funfold Card Measurements & Instructions
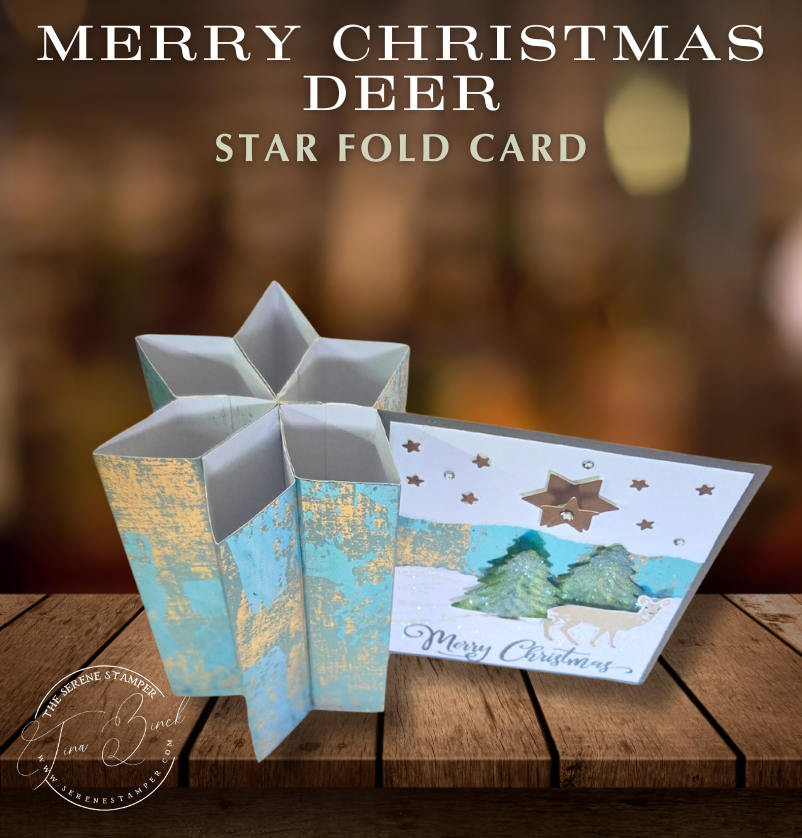
When folded, this card measures 5″ x 7″ (that’s with the star panels folded in).
Start with a card base measuring 5″ x 6″.
You’ll need six pieces of patterned paper, each cut to 5″ x 4″.
- Two of these patterned papers will be scored along the 4″ side at 1″, 2″, and 3″.
- The remaining four pieces will be scored along the 4″ side at ½”, 1½”, 2½”, and 3½”.
Once everything is scored, fold on each line to get nice, crisp creases.
Add glue to the ½” flap of one of the patterned papers and adhere it along the edge of your 5″ x 6″ card base. Apply glue to the next ½” flap, position it right against the first one, and press down — this forms your first “box.”
Repeat this with the next piece, then flip your card base over and do the same thing on the opposite side.
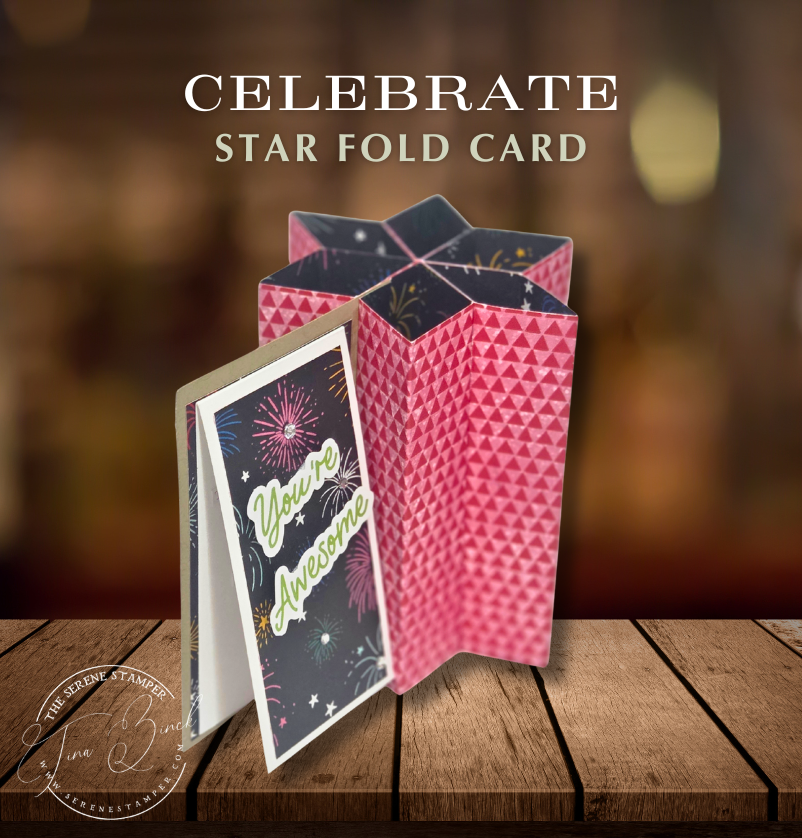
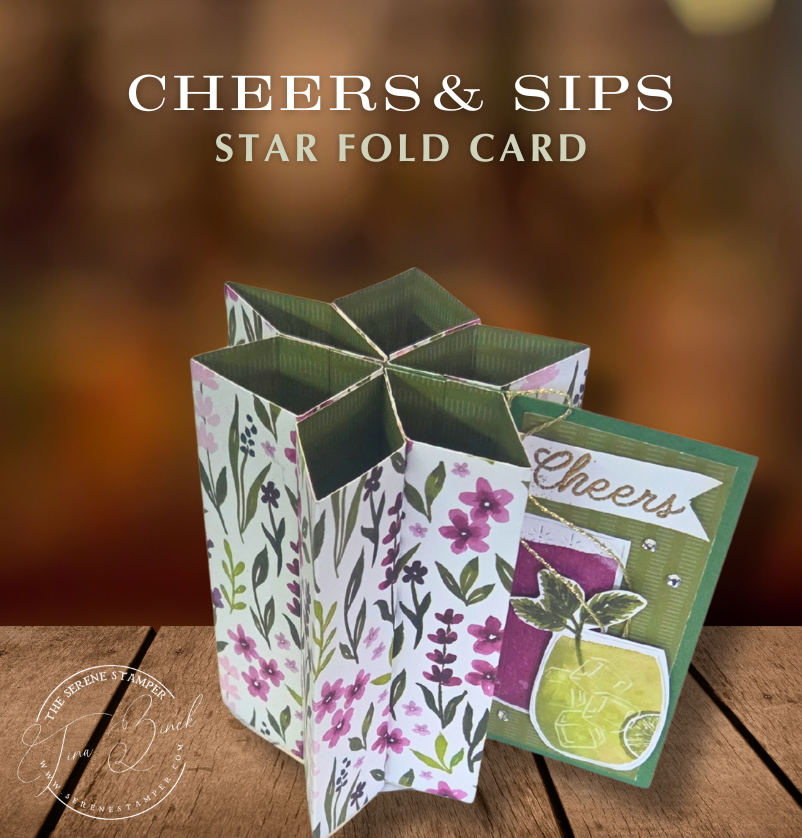
Now take the two patterned pieces scored at 1″, 2″, and 3″ and glue them between the panels you just attached. This creates the signature star shape in the centre.
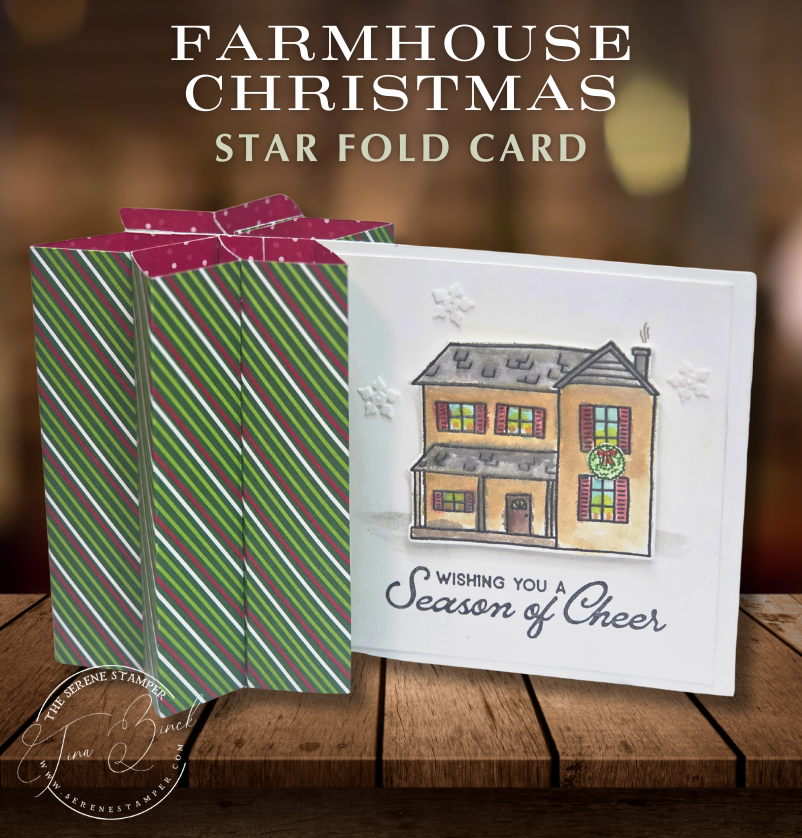
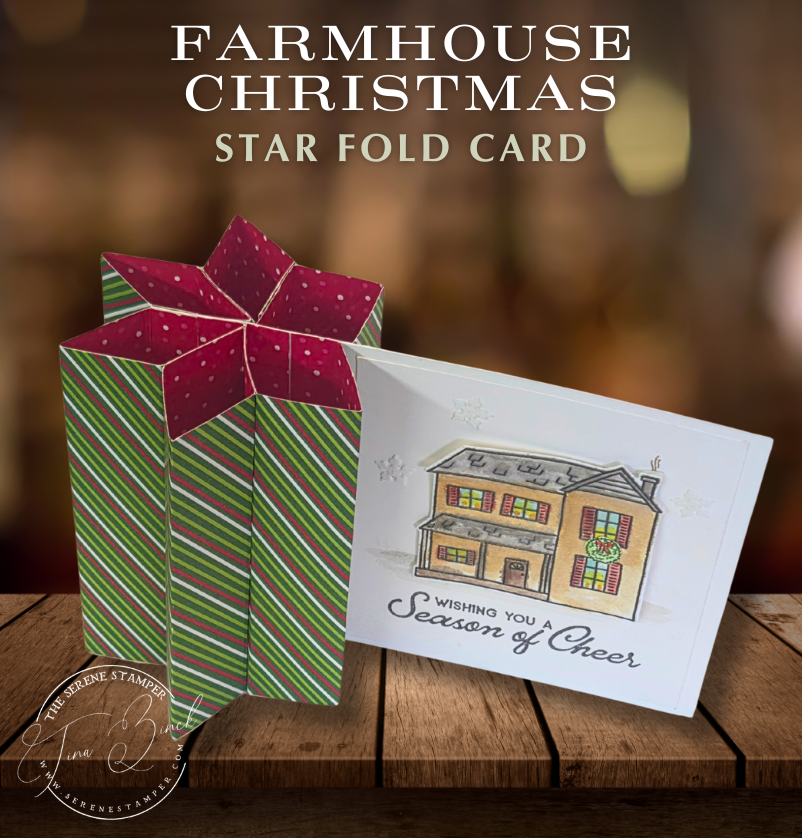
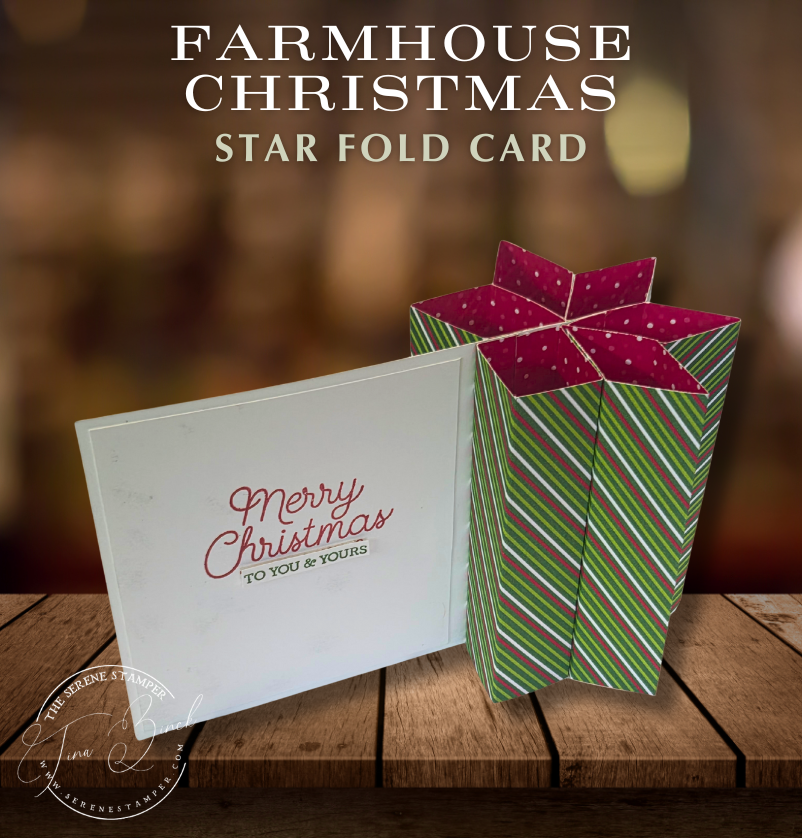
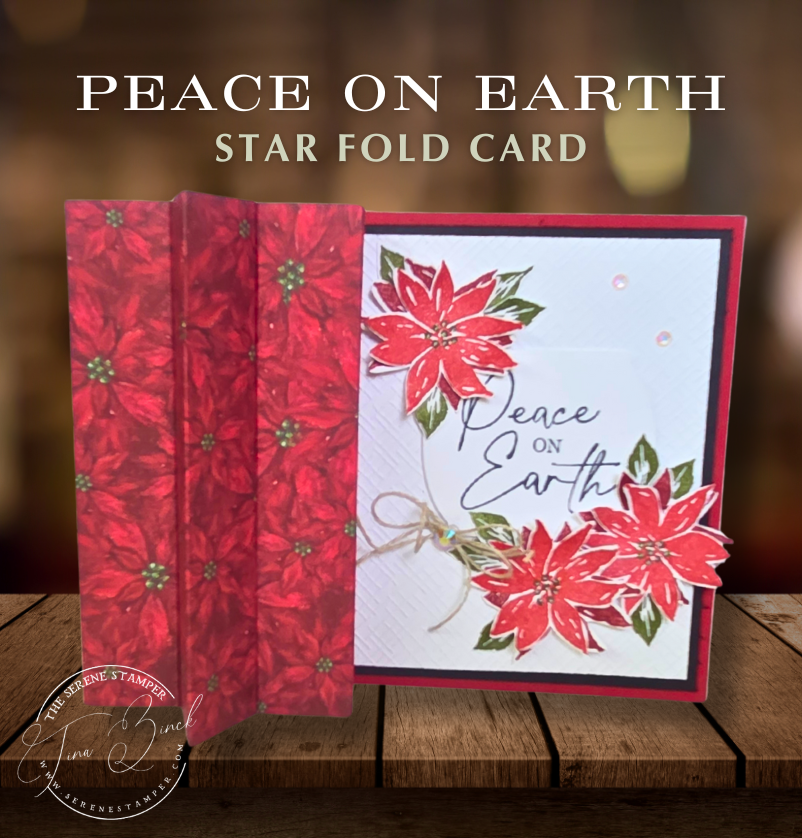
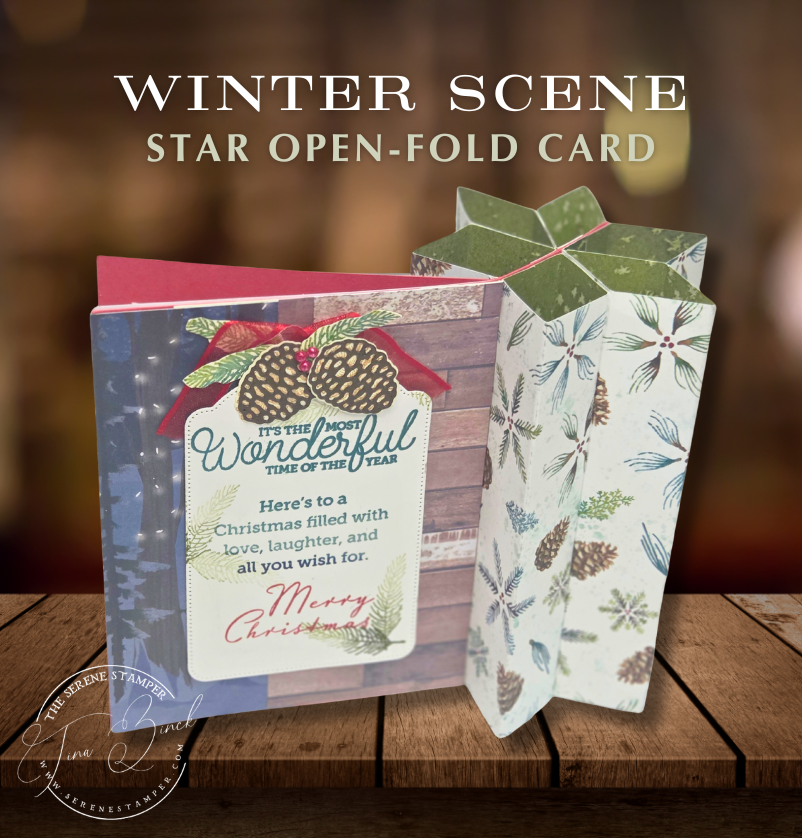
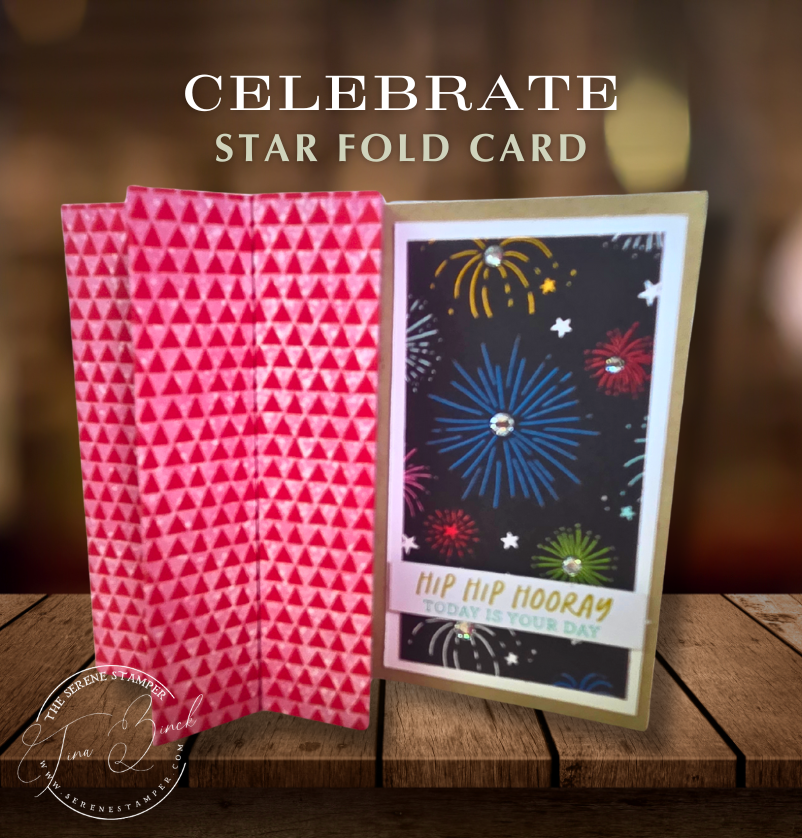
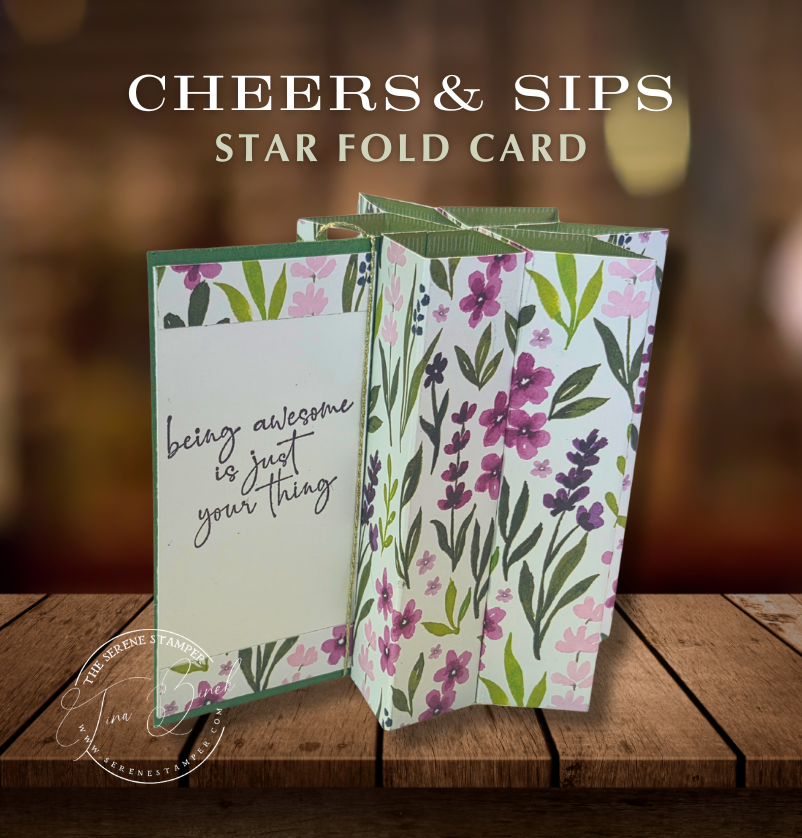
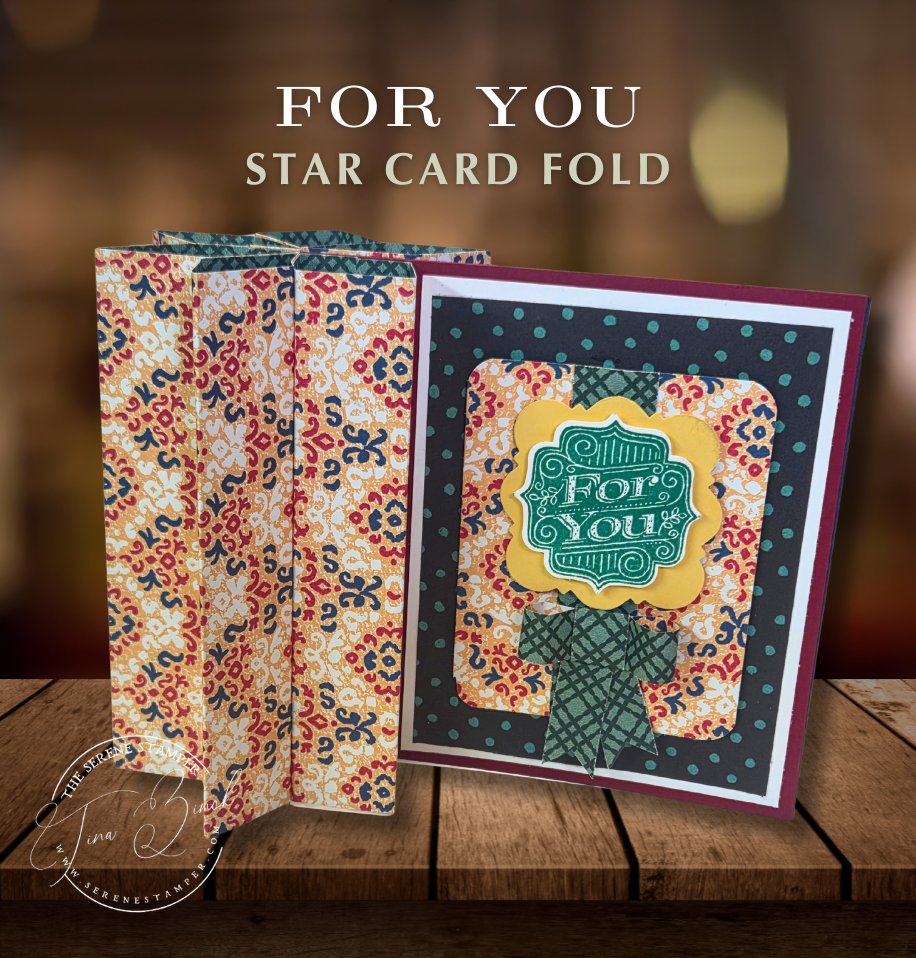
Once your base is complete, decorate as desired — add stamped images, sentiments, or embellishments to make it your own!
🎥 Watch the Tutorial
Scroll down to see all the cards that I made, including variations:
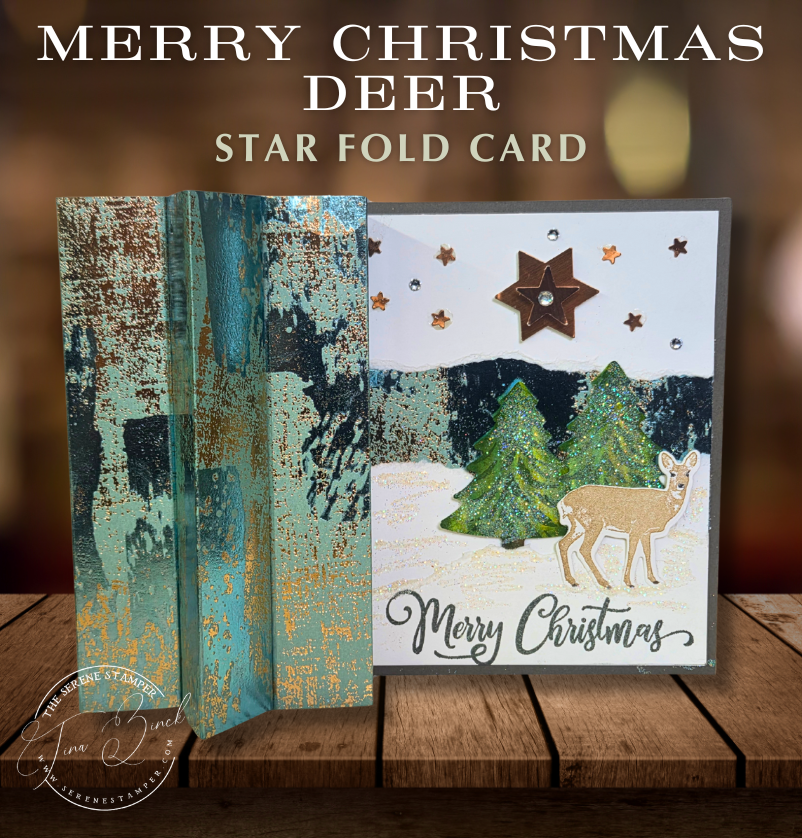
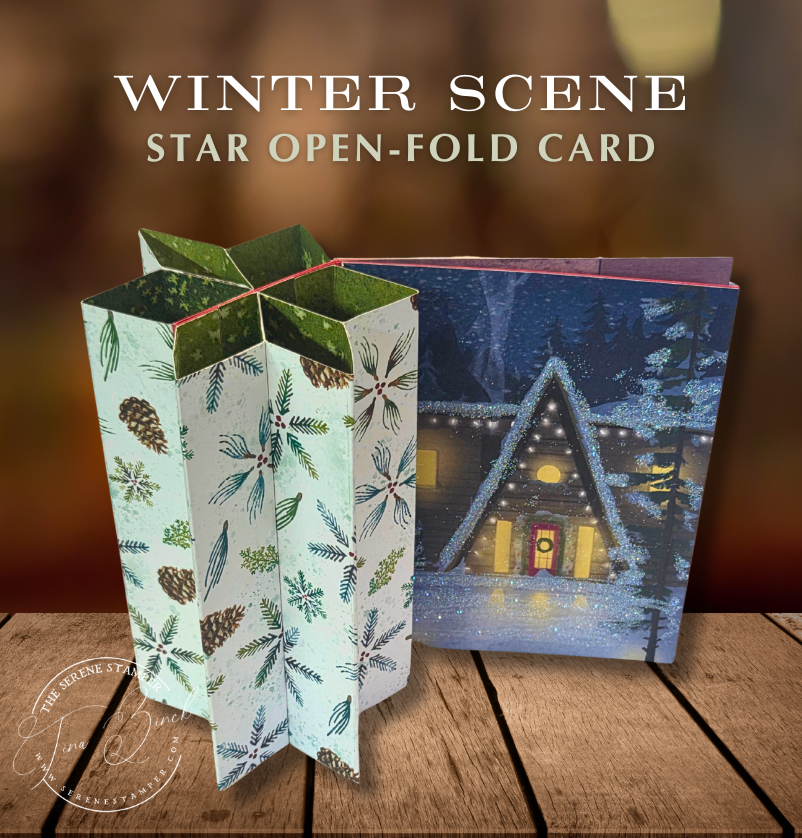
This card measures 5″ x 7″, when the star is folded – so it does indeed fit inside an envelope! The paper I used on this card is “Dry Brushed Metallic” 12″ x 12″ Specialty Designer Series Paper (retired from Stampin’ Up!).
🌟 Variation #2 — 4¼” x 7″ Star Funfold
This version measures 4¼” x 7″ when folded, so it’s slightly narrower than the original 5″ x 7″ design but still has that same dramatic star look.
The construction and scoring are identical to the first version — you’ll follow the same steps and measurements for your patterned paper pieces, just adjusting the width of your card base to 4¼” x 6″.
You’ll need six patterned papers measuring 4¼” x 4″, and you’ll score along the 4″ side using the same marks as before:
- Two pieces scored at 1″, 2″, and 3″
- Four pieces scored at ½”, 1½”, 2½”, and 3½”
Assemble it the same way, folding and gluing your panels to form the star shape.
This slightly narrower design has such a pretty balance — it still fits beautifully in a 5″ x 7″ envelope, but it’s a touch more compact.
This card measures 5″ x 7″
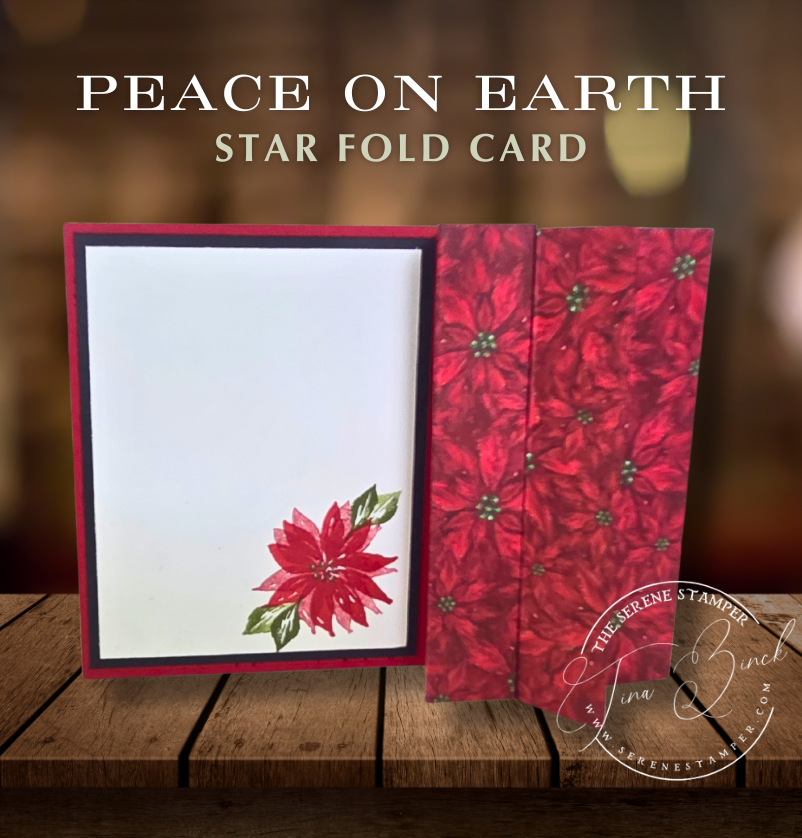
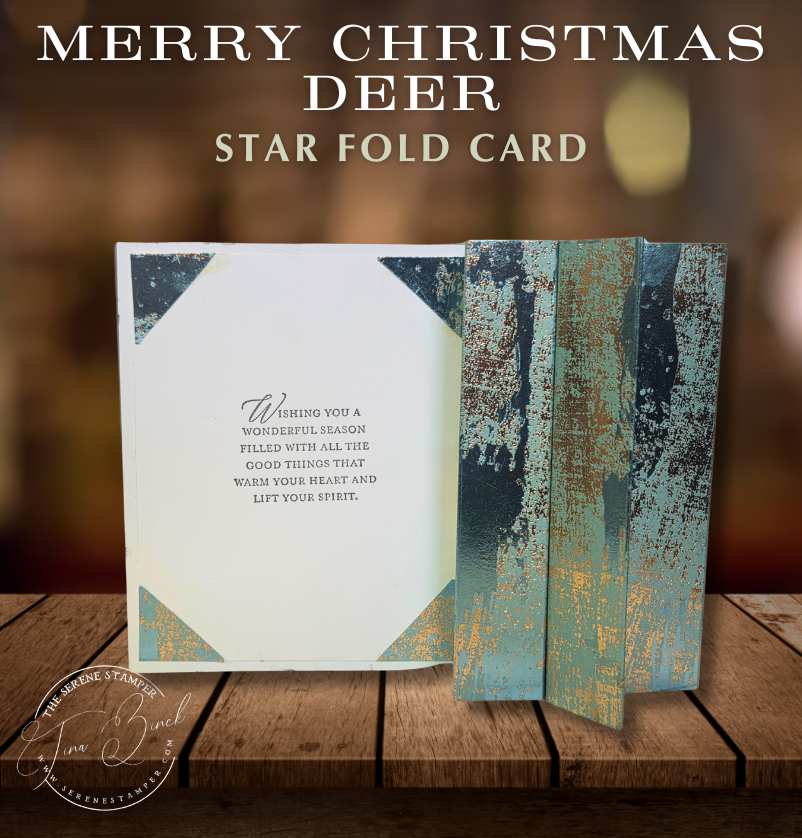
🌟 Variation #3 — Opening Card Base
This version has the same overall 5″ x 7″ finished size, but instead of a flat card front behind the star, it opens like a traditional card!
The patterned papers are cut and scored exactly the same as the first version.
For the card base, start with a piece of cardstock measuring 5″ x 12″.
- Score and fold in half at the 6″ mark.
- Then, on each side of that centre fold, score at 2″.
Glue those 2-inch flaps together to create a solid centre panel.
That’s when you’ll start gluing on your folded patterned paper pieces, just like we did on the first card, to create the star.
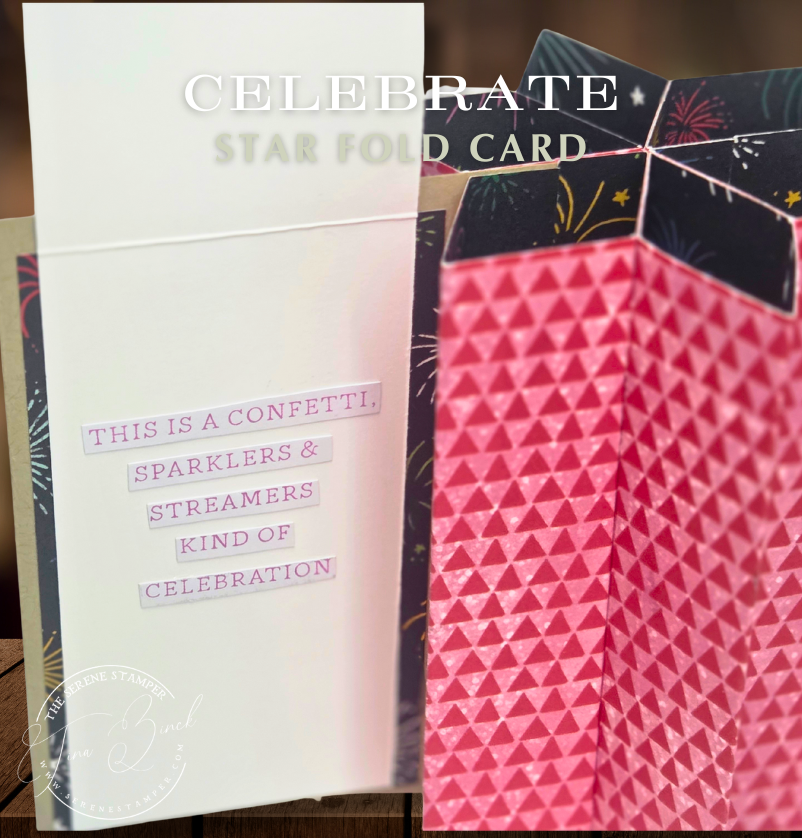
Once that’s done, decorate the card as desired. The best part? It now opens up like a regular card, giving you extra space to write your message or add more creative details inside.

💫 Variation #4 — A2 Size (4¼” x 5½”)
Here’s a smaller version of the Star Funfold, perfect if you prefer the standard A2 size. When folded, it measures 4¼” x 5½”.
The construction is the same as the larger card, but your measurements will change slightly:
- Card base: 4½” x 4¼”
- Patterned paper pieces: 4″ x 4¼”
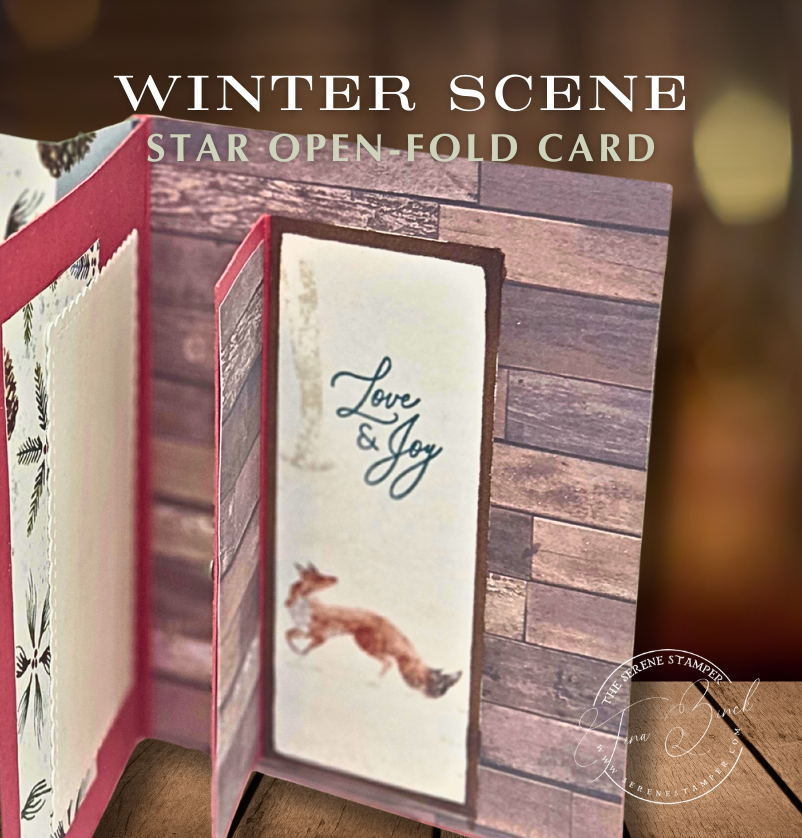
All of the scoring measurements remain the same — you’ll score along the 4″ side just as before. I also added a little folded layer for the sentiment.
This smaller version fits in a standard envelope and is a great way to use smaller pieces of patterned paper or leftovers from larger sheets.

This card – which is 5″ x 7″, was made using a pretty gift tag a friend made me that I recycled. I can’t wait to pop this card in the mail to her!
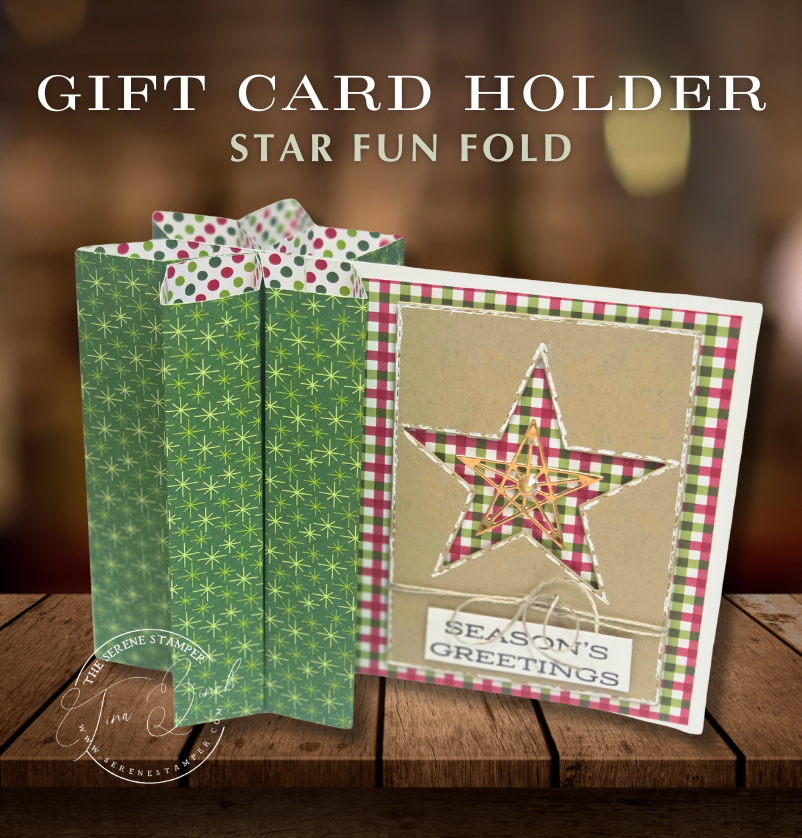
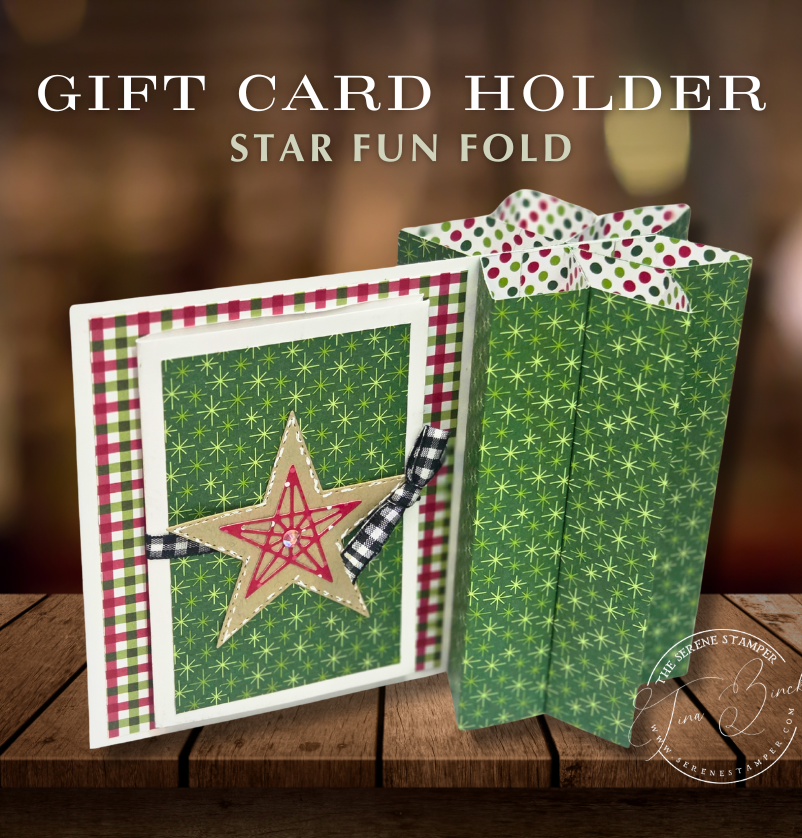
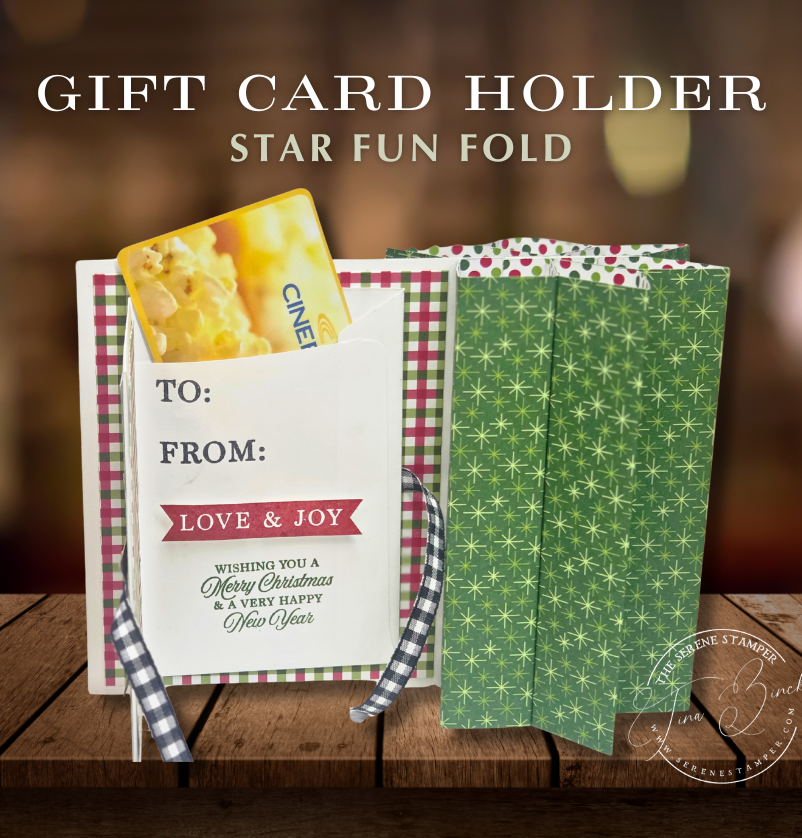
🎁 Variation #4 — Gift Card Holder
This one’s perfect for birthdays, holidays, or thank-you gifts! It’s the same design as the original, measuring 5″ x 7″ when folded, but with a gift card holder added to the back.
The patterned papers are the same measurements as before.
To create the holder, take a standard-size envelope and fold it in half widthwise.
Open it up, cut off one of the top flaps, then glue down the other flap to form a pocket.
Decorate the front with patterned paper, wrap ribbon around it, and secure the ends with double-sided tape.
Glue the envelope pocket to the back of your card, slip in a gift card, and tie the ribbon into a bow to close. It’s so simple but adds a special touch!
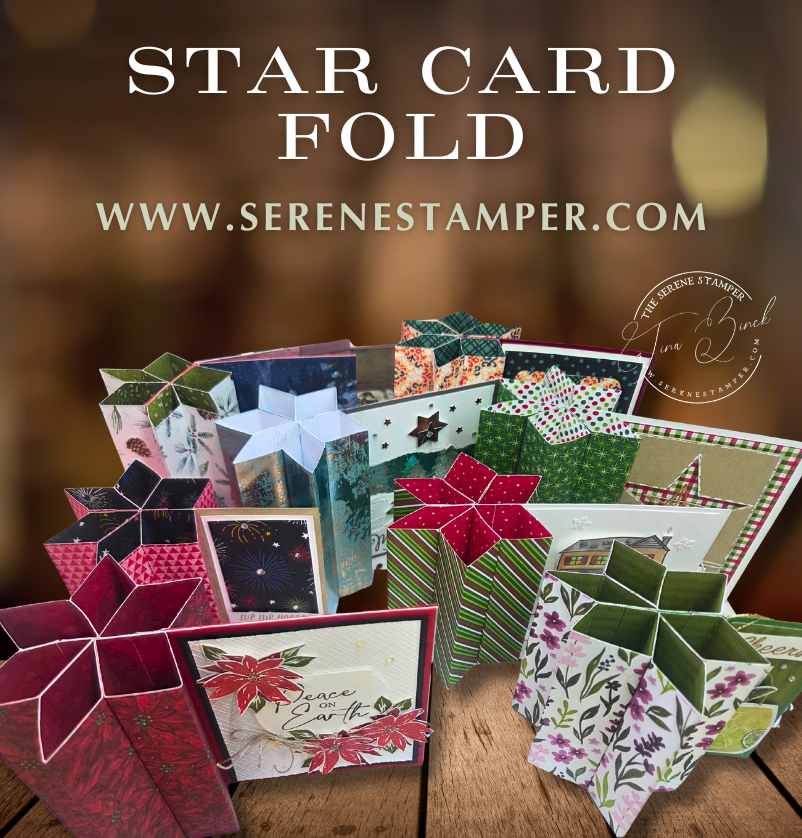
In total, I created eight Star Funfold cards — four of the 5″ x 7″ size, one 7″ x 4¼”, and a few in the standard 4¼” x 5½” size. Each one has its own look depending on the papers and embellishments used, and they all turned out beautifully.
You can use any patterned papers you have — even retired or dollar-store finds. This is a great project to use up scraps and rediscover forgotten favourites in your stash.
Many of the products I used to create these Star Funfold Cards are retired Stampin’ Up! favourites, along with some patterned papers, ribbons, threads, and embellishments from my craft stash. I always encourage you to use what you have on hand and make each card your own!
Here are a few of the retired Stampin’ Up! items featured across my eight cards:
- Cheers & Sips Bundle
- Grassy Grove Bundle
- Peaceful Boughs Bundle
- Ringed with Nature Bundle
- Regal Reindeer Stamp Set (sentiment)
- Trees for Sale Stamp Set
- Greetings of the Season
- Leaves & Holly
- Horse & Sleigh (sentiment)
- Farmhouse Christmas Bundle
- Stitched Stars Dies
- Star Punch
- Tree Punch
💕 I hope you’ll give this Star Funfold a try!
I’d love to know what you think of this funfold! Leave me a comment below and let me know if you’ve seen this before, or is it new to you? And be sure to let me know if you give it a go — I always enjoy hearing how your cards turn out.
Take care & HAPPY STAMPING!

Awesome idea
Thank you for sharing your fabulous card ideas
Watching from Southern California
Have watched you for years
Take care and thank you
It’s my pleasure – I’m so gad you love these cards, Patricia. Thank you SO MUCH for watching my channel and following along my journey – it truly touched my heart and means a lot to me. You take care too, my friend, and HAPPY STAMPING!
wow,these cards are beautiful I can’t wait to start making them,tfs Much Hugs.🫶
Hi Jenny! Thanks so much and let me know how your cards turn out! Have fun! xoxox
Hey there I love this card , I stayed up late and made 2 of them. just need to get ideas how to decorate my cards,
LOVE LOVE These cards Thanks for sharing all the instructions!
Hi Maria – I LOVED reading your comment and I am thrilled that you’ve already made a couple star cards! They’re addictive, right? So fun to make! Have fun decorating them!
Your ‘Star Card’ has that ‘WOW’ feature. Thank you so much for giving such clear instructions.
HI Dorothy – thank you and I hope you have lots of fun making these star cards!
You are an absolute artist!! I have enjoyed many of your videos. THANK YOU! Your ideas and use of color is amazing! You have helped me to learn how to use colors.
Awww, AnnMarie, you are so kind. THANK YOU for you kind words – it means so much to me! xoxo
Beautiful card thank you for the inspiration I’m going to attempt it:) look forward to watching and learning from more of your videos. Have a wonderful day!
Hi Dawn! Thank you so much! Let me know when you make these star cards and how yours turn out – you’ll have a lot of fun with this! HAPPY STAMPING!
Had not seen this before. Love it.🥰🙏🏻
HI Elaine – I only just recently saw a star card shown on IG (stampyourcard) and my jaw dropped! I’m so glad I shared it – you’ll have fun making these!
A new card to try Thanks
Have fun with these, Debbie!
WOW! That’s all I can think to say, just WOW! Thanks for the great video and measurements.
Barbara
Thanks so much, Barbara! I was wowed too, when I first saw a star card (on Instragram) – I am so happy I shared it! Have fun making these!
Love this card idea so much! Thank you for sharing it! I had been looking for something special to make, and I think this is perfect!
Hi Hollie – Let me know when you try this fun fold! HAPPY STAMPING!
this is a beautiful fun fold card. I can’t wait to try it
Thanks Cory! Have fun making these!
These cards are awesome!! I will try to make some in a few days. They will definitely surprise people! Thank you so much for the tutorials!!
Hi Debbie! I am so happy you like these cards – have fun making them for your friends and family!
OMG! What a sensational idea! I am definitely making these this year. Thank you!
YAY! I’m so glad you love this! Have fun making them, Dianne!
Tina……..thanks for all the inspiration. How do I subscribe to your blog? I follow you on YouTube.
Thanks for following along, Maggi!
Tina, thank you for the great video. I made the variation #4 using the measurements on your blog . It didn’t work scoring on the 4 1/4” side. So, I tried on the 4” side and it came out perfect. Now I just have to figure out how to decorate! Wish me luck! TFS.
Hi Karen! Yes, I’ve doing the scoring along the 4″ side. Have fun decorating your cards – I’m sure they will be beautiful!
Thanks for the great card. Your directions were perfect and I loved that you gave directions for different sized cards. I had fun making one .
Thanks so much for letting me know the directions were helpful and I’m so glad you’ve already made one of these cards!
This is going to be my Christmas card this year for friends and family. Thanks for sharing your amazing cards. Love watching your creative process! You have such a gift!
Awesome! I’m going to be making a lot more star cards for Christmas this year too! I already gave away the star card that opens to friends and they LOVED it!
All your cards and decorative techniques are beautiful. Ty for sharing.
Thanks so much, Betty!
wow! love this fun fold! Thanks for showing us this show-stopper! I can’t wait to make my own!
You are so welcome, Charmion! Hope you have fun making these star cards!
Wow! Thanks for all these variations and instructions! I can’t wait to give this a try!
Beautiful!
Thanks so much Shari! I know you’re going to have a LOT of fun making these!
Tina,
You are such an inspiration. I have followed you for years and continue to be so impressed with all the amazing cards you create. Not to mention your amazing recipes. Thank you for making it all look so easy.
I look forward to your new adventures. Happy Thanksgiving!
Oh, Sheila, THANK YOU. I truly appreciate your kind words and they mean so much to me. I am so happy you enjoy my cards. Not sure if you’re aware, but I’ve started sharing my recipes on my new channel https://www.youtube.com/@simplyserenewithtina (blog coming soon at http://www.simplyserene.ca). THanks again, Sheila and have a wonderful Thanksgiving! xoxo
Amazing! I love it. Thank you for sharing!
Thanks lovely lady! I’m so glad you like it. Love ya, Friend. xoxo
This is such a great card!! Sooo nice of you to share!! Thank you!
Thank you Pat! I’m so happy you enjoyed this!
Thank you so much for your time and the very clear instruction. Your cards are beautiful.
Thank you so much, Kim. I really appreciate your kind words!
Love this card. I have watched the video several times. I’m trying the A2 size. The instructions say that all the scoring is the same and done on the 4-1/4″ side. But the video looks like you have the 4″ side at the top. I just want to make sure I get it right before I cut and score the papers. Thank you for all the work you put into this.
Hi Mary. Score down along the 4″ side, not the 4 1/4″ side. Thank you for your message and I’ll correct the measurements. Have fun making your cards!!!
Beautiful cards. What DSP did you use for the winter scene card?
Thank you Karen! The paper I used on this card is “Dry Brushed Metallic” 12″ x 12″ Specialty Designer Series Paper (retired from Stampin’ Up!). Have fun making these cards!
Very Lovely cards. What DSP did you use for the Winter Scene star open fold card.
Thank you
Hi Karen. Thanks so much for your kind words! The paper I used on this card is “Dry Brushed Metallic” 12″ x 12″ Specialty Designer Series Paper (retired from Stampin’ Up!).
Hi
I just happened to see your video on the star card which is so awesome. Unfortunately I haven’t been making cards as long as many of the others and I wonder if you might be able to send me or tell me how to find a tutorial for your star card in an A2 size so I could possibly try to make this. The directions are much appreciated.
Thanks
Maggie
Hello Tina,
I love this card and all of the variations you have shared. I am going to be making this card for my Christmas cards this year. I just also wanted to thank you so much for sharing the instructions for each of these cards. You are most generous for doing that.
HI Angella! I am super happy you enjoyed this cards! I have no doubt you’ll have lots of fun making them. HAPPY STAMPING!