Hi friends! There are some paper crafting projects that are simply fun to make… and then there are the ones that make people stop and say, “How did you make that?”
This Victorian Twist Box definitely falls into the second category.
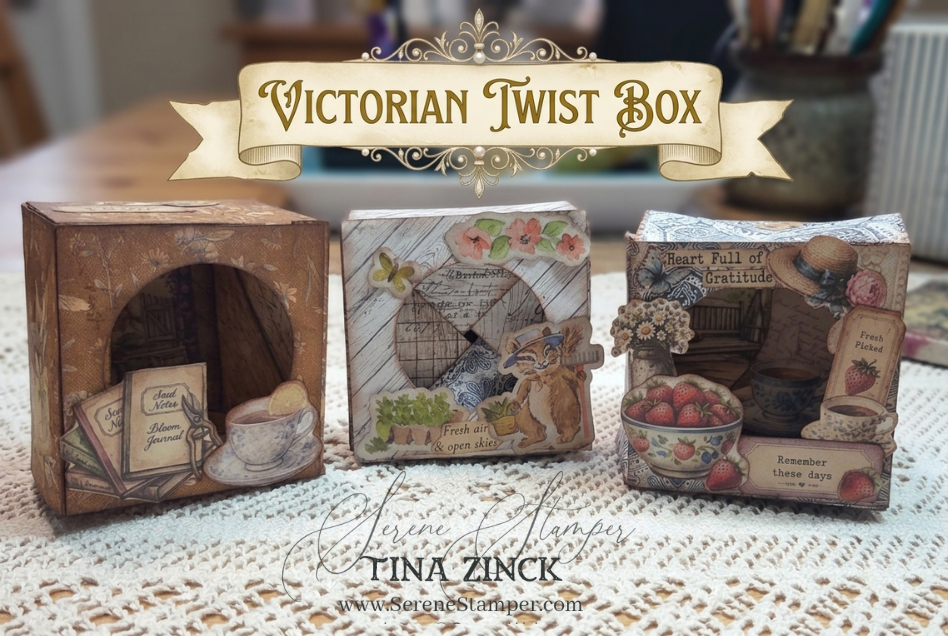
At first glance, it looks like a beautiful decorative shadow box. But with one simple twist, the centre magically opens to reveal a hidden scene inside! It’s such a clever design, and once you understand how it works, you’ll find yourself making them again and again.
In today’s video tutorial, I’ll show you exactly how to create one from start to finish, along with a few tips that made the process much quicker after making several of them.
Here are the measurements for you:
Victorian Twist Box
Cut:
- 2 pieces: 3″ × 3″
- 4 pieces: 3″ × 4″
Score:
- Score the 3″ × 4″ pieces at ½” along one of the 4″ edges.
- Fold the ½” tab to the inside.
Assemble:
- Glue the ½” tabs to the centre 3″ × 3″ piece.
- Fold each side panel diagonally as shown in the sketch.
- Cut a circle in one 3″ × 3″ piece (for the top window).
- Glue the second 3″ × 3″ piece to the bottom.
- Decorate as desired.
If you’d like, you can also glue a 3″ × 3″ piece of coordinating cardstock or patterned paper inside the box for a little extra interest. I did this on my Christmas Twist Box, which I demonstrated in the video.
I’ve created a free PDF tutorial for you, complete with my folding template (a little fancier than the hand-drawn one I used in the video!):
You can customise these boxes using almost any papers and embellishments you already have in your craft room.
Some ideas include:
- Vintage papers
- Scrapbook paper
- Junk journal ephemera
- Printed digital papers
- Flowers
- Labels
- Tags
- Die cuts
- Distress Ink (optional)
The possibilities are endless, making each box completely unique. If you’ve ever wanted to make an interactive paper project that looks far more complicated than it actually is, I think you’re going to love this one. 😉
I hope this project inspires you to pull out your favourite papers, gather up all those little bits and pieces you’ve been saving, and give this fun fold a try!
Have a wonderful weekend and HAPPY STAMPING!

PS: If you enjoy the slower, more meaningful side of life, I’d love to invite you to take a peek at The Serene Post – my monthly envelope filled with seasonal inspiration, created with love here in rural Nova Scotia.
It’s become my favourite thing I create each month, and I’d be honoured to share it with you. 💕
You can learn more by clicking here…

I absolutely love these! Thank you for the .pdf to download!
HI Laura! I am so happy you love these! They’re so fun to make – enjoy! xoxo