HI Friends! If you’ve been following me for a while, you already know I’m a stamper at heart… but today, I fell headfirst into a whole new creative rabbit hole — washi and PET tapes from The Washi Tape Shop. And friends… I’m smitten! Holey moley.

These tapes are absolutely gorgeous. The artwork, the colours, the detail — it’s all so beautiful, and I couldn’t wait to start playing with them. One roll turned into another, and before I knew it, I had cards, fun folds, and even a sweet little pop-up mini album spread across my desk.
Whether you’re brand new to washi or you’ve already got a drawer full of it, I think you’re going to love how easy these projects are. The tapes make the designs do all the work — no colouring, no fuss — just peel, place, and create something pretty in minutes.
I’ve got all the measurements, supplies, and photos for each card below, along with details about the adorable little pop-up mini album (I can’t wait to make more)…
But first, a quick heads-up in case you’re planning to shop…
🛍️ THE WASHI TAPE SHOP SALES & SAVINGS
🎄 BLACK FRIDAY SALE: 20% OFF
Code: FRIDAY
Dates: Nov 20–30, 2025
👉 Click my link HERE then enter the code FRIDAY at checkout.

🎁 CYBER WEEK: 20% OFF
Code: MONDAY
Dates: Dec 1–7, 2025
👉 Click my link HERE then enter the code MONDAY at checkout.

✨ AFTER THE SALES:
Use my personal code SERENESTAMPER10 for 10% off all future orders (anytime!). How awesome is THAT?! To get the discount on all your orders you can either click my link HERE or use my code.
Shopping through my link not only saves YOU money, but it also it helps support my channel and blog, and I’m truly grateful for you. 💕
🎥 Okie doke — ready to see everything in action?
Here’s the full video where I unbox the gorgeous goodies I received from The Washi Tape Shop (I’m so grateful!), and then walk you through every single project — the cards, the pop-up slider fold, and the stacked mini album.
I had an absolute BLAST playing with these tapes for the first time, and I hope you enjoy the video just as much as I enjoyed making it!
❄️ Card 1: “Happiest of Holidays” — Frozen World Scenic Frame Card
This was the very first card I ever made using the products from “The Washi Tape Shop” — and oh my goodness, was it ever fun. The Frozen World images are already so beautiful on their own, so pairing them with a soft frame, embossed stars, and a touch of shimmer made this card come together like magic. It’s elegant, wintery, and surprisingly easy to put together.

✨ Notes & Tips
- The washi tape tears & peels beautifully!
- You can reposition it if needed — just lift and adjust right away.
- The textured paste gives the trees and hillside a frosted sparkle.
- The embossed stars on the dark Basic Gray really shine — especially with rhinestones in the centres.
- This layout is terrific for washi/PET tapes because the frame naturally “contains” the scene.
Measurements
Card Base
- Basic Gray: 11″ × 4¼”
• Score at 5½”
Layered Frame
Cut using two nested Stitched Rectangle dies.
- Outer Frame: approx 5⅛” × 4″
- Inner Opening: approx 4⅛” × 3″
Circle Layer
- Cut with stitched circle die (approx 3⅛” diameter)
Inside card:

Supplies Used
The Washi Tape Shop
- Pre-cut Frozen World Wide Washi/PET Tape (scenic winter village + elements)
Stampin’ Up! Products
(The following items are retired)
- Stamp Sets:
- So Many Stars (stars on the background)
- Merry Moose (sentiment)
- Regal Reindeer (sentiment)
- Dies (retired):
- Stitched Rectangle Dies
- Stitched Shapes Dies – Circles
- Stitched So Sweetly Dies – (inside sentiment layer)
(Current products below)
- Cardstock: Basic Gray, Basic White
- Adhesives: Stampin’ Dimensionals, Liquid Glue, Glue Dots
- Tools:
- Take Your Pick Tool + Crafter Tips
- Heat Tool (for embossing)
- Die Cutting Machine
- Ink:
- Memento Tuxedo Black
- Crushed Curry
- Versamark
- Embossing:
- White Embossing Powder
- Embellishments:
- Rhinestones
- Linen Thread
- Pearlescent Enamel Effects – White (retired)
- Shimmery White Texture Paste (retired)
🚂 Card 2: “Onward to New Adventures” — Frozen World Train Scene
This second card is REALLY simple — but again, the artwork from the Frozen World pre-cut washi stickers makes it look like a full illustration. The snowy train scene is so striking that all it needed was a clean layout and a bold sentiment. Quick, elegant, and perfect for winter occasions. And to be honest, I think these designs are perfect for masculine cards too — don’t you? The scenery has that classic, timeless feel that works beautifully for anyone on your list.

✨ Notes & Tips
- These pre-cut stickers from Frozen World are incredibly detailed — they instantly become the star of the card.
- Keeping the layout clean makes the artwork shine.
- The stitched label on the inside adds just a little extra polish without adding bulk.
- “Onward to New Adventures” is from one of my Serene Stamper Sentiment Sheets — a little digital gift I sent out to my newsletter friends a couple of months ago.
If you love having extra sentiments handy, make sure you’re subscribed so you don’t miss the next freebie! You can join my newsletter by clicking HERE.
Measurements
Card Base
- Basic White: 8½” × 5½”
• Score at 4¼”
Inside Layer
- Basic White: 5¼” × 4″
Inside Sentiment Layer
Cut with Stitched So Sweetly Dies (retired)
- Die-cut size approx: 2¾” × 1¾”
Inside card:

Supplies Used
The Washi Tape Shop
- Frozen World Pre-Cut Stickers (train scene)
Stampin’ Up! Products
Retired Items:
- Stitched So Sweetly Dies (inside sentiment label)
- Ride the Range stamp set (inside greeting)
Current Products:
- Cardstock: Basic White
- Ink:
- Real Red (inside)
- Memento Tuxedo Black (inside + sentiment shading)
- Adhesives: Stampin’ Dimensionals, Liquid Glue
- Tools:
- Paper Trimmer
- Take Your Pick Tool (for placing the washi sticker and Dimensionals)
Serene Stamper Digital Product
- Printable Sentiment Sheet:
“Onward to New Adventures”
(Popped up on Dimensionals)
If you haven’t already, make sure to sign up for my newsletter (click HERE). You’ll get my Serene Sentiment Sheet as a free instant download to use on your own projects.
The sentiment shown on today’s card isn’t included, but you’ll receive lots of other lovely ones!
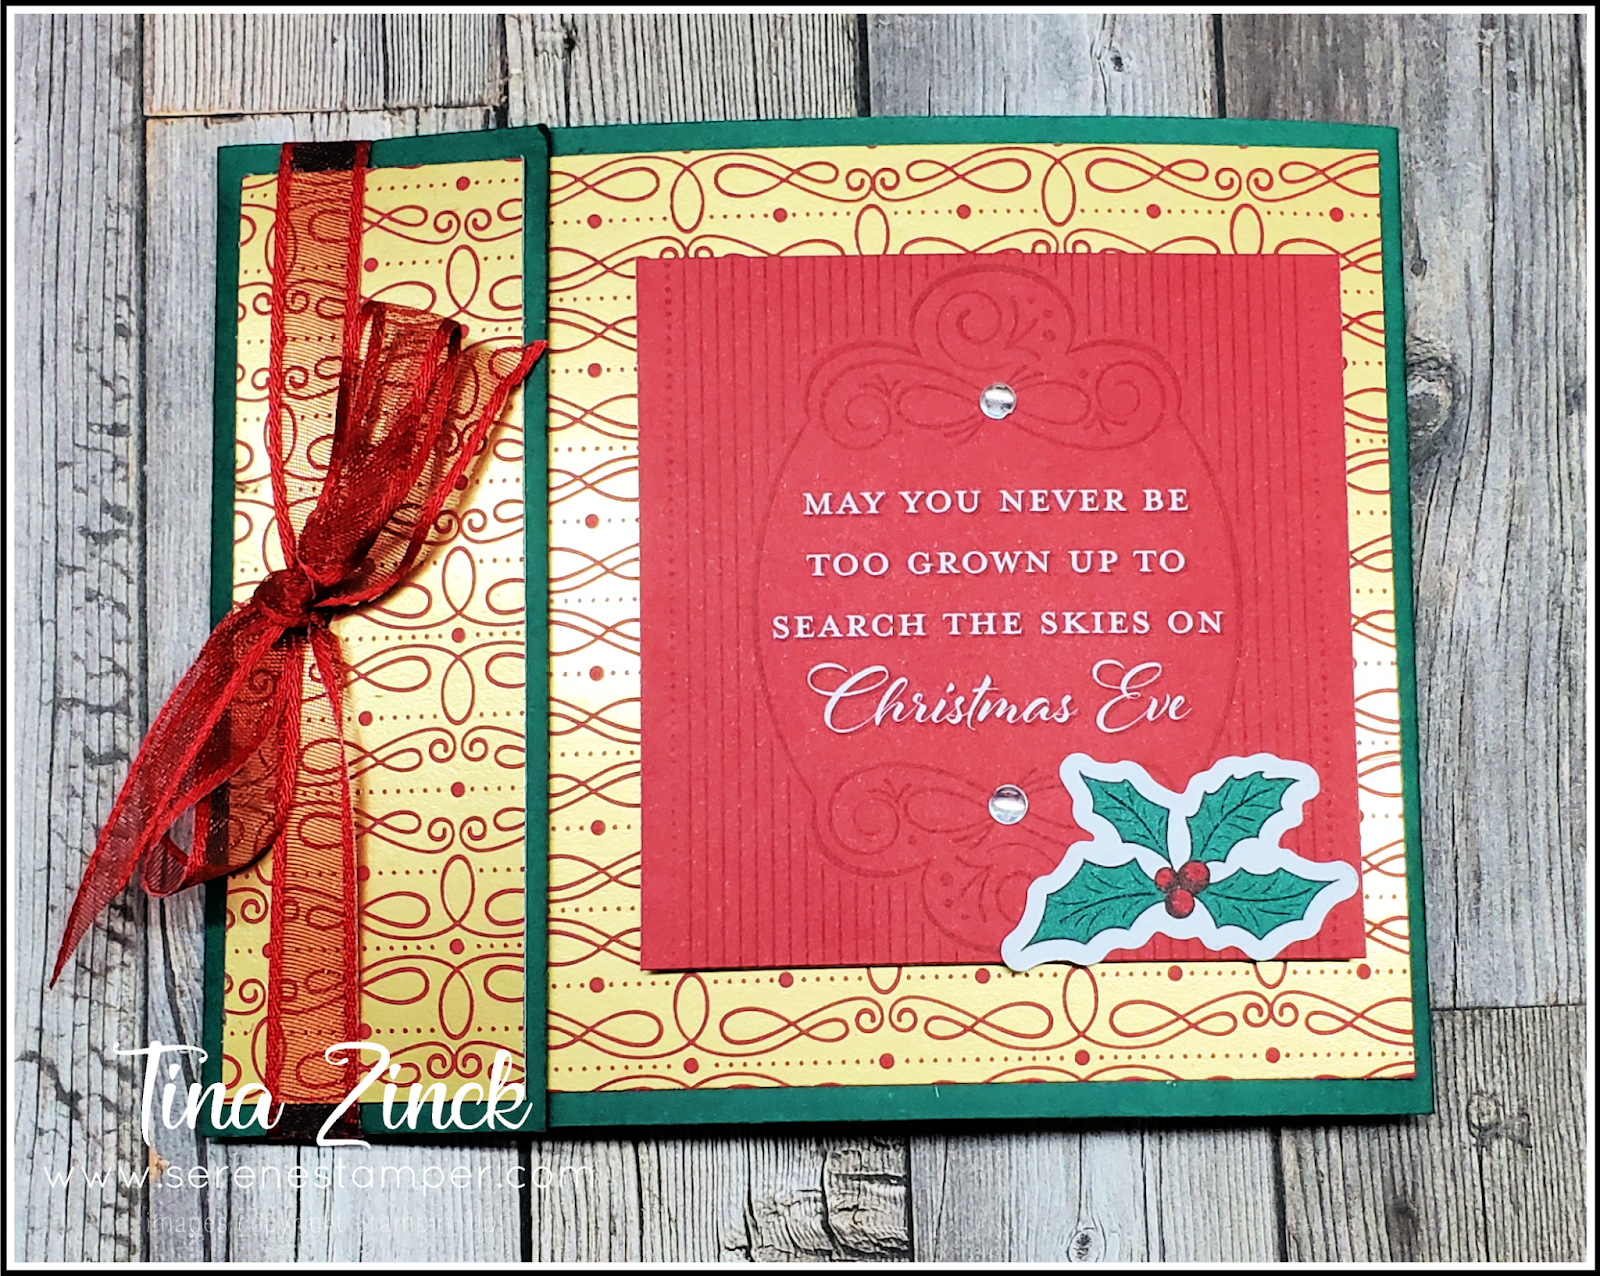
❄️ CARD 3 — Frozen Village Christmas Card
This cozy little winter scene card proves you don’t have to get fancy to make something beautiful. The artwork on the Frozen World washi does all the heavy lifting, and just that simple touch of red ribbon and a bow instantly makes it feel festive and Christmassy.

✨ Notes & Tips
- The snowy village scene fills the space so nicely — no extra layers needed.
- Re-stamping “CHRISTMAS” in Real Red ink (inside sentiment) gives the greeting a lovely pop of colour.
- A little ribbon goes a long way on clean-and-simple cards!
- This design is perfect for mass-producing holiday cards — quick, easy, and elegant.
MEASUREMENTS
- Card Base: Basic White — 8½” × 5½”, scored at 4¼”
- Inside Layer: Basic White — 4″ × 5¼”
- Front Greeting:
- Sentiment stamped in Memento Black
- “CHRISTMAS” stamped again in Real Red, trimmed out, and adhered on top
Inside card:

🧰 SUPPLIES
- Frozen World Wide Washi Tape (The Washi Tape Shop)
- Stamps:
- Greatest Part of Christmas (retired — front & inside)
- Ink Pads:
- Memento Tuxedo Black
- Real Red
- Ribbon:
- Red & Gold trim (or any narrow festive ribbon)
- Adhesives:
- Mini Glue Dots
- Liquid Glue (optional)
- Tools:
- Paper Trimmer
- Bone Folder
- Take Your Pick Tool
- Scissors

🎄 CARD 4 — EASY POP-UP SLIDER FOLD (Winter Dreamscape Stickers)
This card was soooo much FUN to make — and honestly, it looks far more complicated than it actually is. The washi tape stickers from the Winter Dreamscape collection make it so easy to build beautiful scenes, and the little pop-up action adds a sweet surprise for the recipient. Oh my goodness. I’m so in love with these washi tapes! LOL

When you open the card the panel in the centre slides up! How cool is THAT?

💡 Notes & Little Tips
- The stickers layer beautifully and I love how they look hand-painted right onto the cardstock.
- The slider mechanism works smoothly as long as the centre slit is just wide enough (approx. 3⅛”).
- A little embossed texture on the front panel adds a lovely contrast to the smooth stickers.
- Don’t forget to decorate the inside — the stitched rectangles with stamped greetings add such a lovely finished touch.
- This fun fold is fantastic for showcasing large images like the Christmas tree sticker — it pops up perfectly!
Measurements
Card Base
- Smoky Slate Cardstock
• 11″ × 4¼” — scored at 5½”
Inside Pop-Up Slider Section
- Designer Series Paper (DSP)
• 11″ × 4″
• Score along the 11″ side at: 3″ • 5½” • 8″
➡️To create the little slot along the centre fold on the DSP (where the pop-up panel slides), I used a retired banner punch from Stampin’ Up! It works perfectly for taking off just a tiny sliver of the crease.
You can absolutely use what you have:
- A long, narrow die — just place the edge of the die over the fold and trim off a teeny slice.
- Scissors — a quick snip right along the fold works just fine.
- An X-Acto knife — simply cut a very thin opening along the crease.
You only need a narrow slot — just wide enough for the pop-up mechanism to move freely — so don’t overthink it. A little trim is all it takes!
- Pop-Up Slider Piece (Basic White)
• 4¾” × 2¾”
• Score at ½” along the 4¾” edge
• On the ½” flap, cut up the centre to the score line, and fold flaps in opposite directions
Front Panels
- DSP layer on card front: 4″ × 5¼”
- Embossed Smoky Slate layer: 3¾” × 5″
- Stitched White Panel (front focal): approx. 3″ × 4″ after die-cutting (Stitched So Sweetly Dies)
Inside Sentiment Panels
- Basic White (Stitched So Sweetly Dies): approx. 3″ × 2″
- Sentiments stamped in Real Red
- Stamp set used: From Our House to Yours (retired)

🧰 Supplies Used
Stampin’ Up! (Current & Retired Mix)
- Smoky Slate Cardstock
- Basic White Cardstock
- Stampin’ Dimensionals
- Mini Glue Dots
- Liquid Glue
- “Greetings for You” Mix & Match Ephemera Pack (current — sentiment pieces on card front)
- Stitched So Sweetly Dies (retired)
- 3D Snowflake Embossing Folder (retired)
- Iridescent Rhinestones
- Ribbon scraps for the “one-hole bow”
- Take Your Pick Tool
- Paper Trimmer
- Die-cutting machine
- From Our House to Yours stamp set (retired; inside sentiments)
The Washi Tape Shop
- Winter Dreamscape Washi Tape

🎁 A Sweet Little Extra
This fold is one of those cards that makes people say “How on earth did you do that?!” — but it truly is beginner-friendly once you see it in action. And I must say, I absolutely love how this card turned out with the mix of plaid DSP, the adorable Winter Dreamscape art, and that little slider pop-up makes it festive, interactive, and just plain fun.
🎀 One-Hole Bow Tutorial (used on today’s fun fold!)
This little bow is an oldie but a goodie — perfect for cards, albums, tags, and more. If you’ve never tried it before, you’re going to love how easy it is!
Here’s a fun throwback tutorial for you:
How to Make a Matchbook Album and a One-Hole Bow
Blog post: https://serenestamper.com/how-to-make-matchbook-album-and-one/
Video tutorial: https://youtu.be/i-YYRbnHwNc
✨ CARD 5 — WINTER’S WHISPER POP-UP SLIDER CARD
(Same fold as Card 4 — new DSP + new stickers!)
This fun fold is built exactly the same way as Card 4 — same measurements, same assembly, same pop-up slider mechanism. The magic comes from swapping out the papers, stickers, colours, and sentiment set to give a completely different look.

🎄 How I Decorated This Card
- The Winter’s Whisper stickers set the tone — soft winter greens, berries, touches of shimmer.
- The sentiment on the front was stamped twice using a Stamparatus:
- First in Cherry Cobbler
- Clean stamp → ink again in VersaMark → stamp directly over top
- Add clear embossing powder + heat set
- I added iridescent rhinestones for a little holiday sparkle.
- The ribbon started off as a vanilla-gold trim — I ran my Cherry Cobbler marker along it to tint it.
- A little tip: Marker-dyed ribbon takes a long time to dry — easy to smudge on your cardstock.
- My favourite method? Add a few drops of ink refill into water, soak your ribbon, squeeze out, lay flat to dry → perfect custom colour every time.
Measurements
(Identical to Card 4)

🧰 Supplies Used
Stickers
- Winter’s Whisper washi/PET tape sticker set
Stamps
- It’s the Most Wonderful Time of the Year (Paper Pumpkin / retired)
- Merry Christmas to You & Yours (Paper Pumpkin / retired)
Inks
- Cherry Cobbler
- Black Memento
- VersaMark
Tools
- Stampin’ Cut & Emboss Machine
- Stitched So Sweetly Dies
- 3D Snowflake Embossing Folder (retired)
- Stamparatus
- Heat Tool
Adhesives
- Liquid Glue
- Mini Glue Dots
- Stampin’ Dimensionals
Embellishments
- Iridescent Rhinestone Gems
- Ribbon (dyed with Cherry Cobbler)

⭐ PROJECT 6 — STACKED POP–UP MINI ALBUM
Winter Dreamscape + Frosted Meadow Washi & PET Tape
This little album is absolutely precious — and it’s the project that has my brain firing on all cylinders with ideas and possibilities! The structure is the same pop–up slider fold from Card #4, but instead this time you simply stack multiple pop-up cards to create a full mini album.
For my mini album, I used five cards total. Just glue them together to form a stack, wrap the front and spine with ribbon, and decorate — and honestly, that’s all there is to it.
This project is SO much fun, and truly… such a beautiful, heartfelt gift idea. It’s one of those keepsakes someone will cherish for years.

Measurements
Album Uses Five Cards Made the Same Way as Cards #4 and #5
Assembly Instructions for the Mini Album
Start with five pieces of Smoky Slate card stock, each measuring 11″ × 4¼”.
Fold each one in half at 5½” to create your card bases.
Create your pop-up slider panels exactly the same way you did for Cards #4 and #5, and adhere your patterned paper to the inside — just don’t decorate the fronts yet.
✨ Stacking the Album
Take the card you want at the back of your album and apply a strong tape adhesive to the front panel.
Place the next card directly on top and press to secure.
Repeat this step until all five cards are stacked together into one tall flip-style album.
✨ Adding the Ribbon Closure
Run strong tape adhesive across the front, over the side binding, and onto the back flap.
Lay your ribbon across the adhesive so it wraps around the spine and ties beautifully in the front.
This keeps everything snug and gives the album a sweet, finished look.
✨ Decorating Your Album
Now the fun part — decorate the front and inside panels however your heart desires.
And don’t forget… the pop-up panels can hold so many different things:
- Photos
- Recipe cards
- Favourite quotes
- Bible verses
- Journaling prompts
- Mini memories
- Imagine turning this into a junk journal
- You could use a perforating tool and each pop-up panel could be a bookmark (or recipe) that you can tear out
As long as the slot along the middle crease is wide enough, your creative panels will slide up. I know you’re going to have as much making these as I am!
(Seriously… it’s amazing I manage to sleep at night — the ideas just keep coming!)

Front Layer (Smoky Slate)
- 4″ × 5¼” — embossed with a snowflake folder
- Lightly swipe white ink across the raised embossing to make the snowflakes really pop — adds gorgeous winter texture!
Front Focal Piece (Basic White)
- Cut with Stitched So Sweetly Dies
- Finished size approx. 3″ × 4″
Inside Decorative Layers
- Various die cuts and punches (I also used Very Vanilla card stock), cut to fit the album panels
(No exact measurements needed — just trim to fit your sections.)

Inside, each pop-up panel features different stickers from the Winter Dreamscape and Frosted Meadow bundles, paired with coordinating DSP and die-cut sentiment panels.
It’s charming, interactive, and incredibly satisfying to flip through.
Supplies Used
Cardstock
- Smoky Slate
- Basic White
- Very Vanilla (for some interior sentiment panels)
Washi & PET Tape
- Winter Dreamscape (wide PET tape + coordinating washi)
- Frosted Meadow (sentiments + images)
Tools & Extras
- Stitched So Sweetly Dies
- Snowflake 3D Embossing Folder (retired)
- White craft ink
- Real Red & Black Memento ink
- Ribbon: White crinkled seam binding
- Tear-n-Tape / Seal+ (for securing ribbon around the album)
- Miscellaneous pre-die-cut Christmas pieces (from your tag-making stash!)
- Iridescent Rhinestones
- Liquid Glue, Dimensionals, Take Your Pick Tool
(Full step-by-step is shown in the video.)

💡 Ideas for Customizing the Album
This design is so versatile. Instead of Basic White for the pop-up inserts, you could use:
- ✨ Photos
- ✨ Recipe cards
- ✨ Bible verses or devotional prompts
- ✨ Favourite quotes
- ✨ Journaling notes
- ✨ Mini calendar pages
- ✨ Gift-coupon pages
- ✨ Little memory snippets
You can make themed albums for Christmas, travel, pets, kids, weddings — absolutely ANYTHING.

🎁 A Sweet Little Gift Idea
Give the blank album with:
- Pre-cut journaling pieces
- A little baggie of stickers
- Some die-cuts
- Or Bible verse cards
It becomes a “creative moment in a gift.”
💕 Thank You for Stopping By!
I hope today’s projects sparked some fresh creative inspiration for you. I had so much fun putting these cards and the little pop-up album together — I”ll tell ya, once I started playing with these washi and PET tapes, I couldn’t stop. They’re REALLY FUN to use (especially combined with stamps), and they make it so easy to create something beautiful without overthinking the details.
If you decide to try any of these cards or the mini album, I would love to see what you make. Tag me on Instagram or share it on my Serene Stamper Facebook page — seeing your creations always makes my day.
My heartfelt thanks to The Washi Tape Shop for sending me these beautiful tapes to try. I absolutely loved creating with them!
And if you’re planning to grab a few goodies from The Washi Tape Shop, don’t forget to take advantage of the Black Friday and Cyber Week savings while they’re available, or use my personal code SERENESTAMPER10 anytime for 10% off. Gotta LOVE discounts, right?
Thank you, my friends, for being here, for crafting along with me, and for all your kind comments, messages, and encouragement. You’re the BEST!💕
Until next time…take care & HAPPY STAMPING!


P.S. I’d love to hear from you — leave a comment and let me know if you’ve ever used products from The Washi Tape Shop!
Disclaimer: The Washi Tape Shop kindly gifted me these products. All opinions are my own.
Leave a Reply