Hi friends! Today I’ve got something different and super fun to share with you – DIY embossing folders! Have you ever wished you could design your own? Well, I gave this technique a try over the weekend and let me tell you, it’s pretty cool! Of course, I filmed the whole process so I could walk you through it too. I’ll be showing you how to use your dies and punches with chipboard (I used some boxes in our recycling) to create custom embossing folders. It’s such a great way to recycle scraps, stretch your supplies, and add one-of-a-kind textures to your projects!
For this project, I used the dies from the Just a Note Bundle and Tags to Go Bundle – both ended up being just perfect for this technique. I even pulled in a couple of (retired) punches to create my own embossing folder too!
Now, I know making your own embossing folders isn’t a brand-new idea – it’s been around for years – but this was actually my very first time trying it. And as you’ll see in my video, there was definitely some trial and error involved. The thickness of the cardboard you use (I experimented with a cracker box and even a lemon pie filling box!) will make a difference, which means the “sandwich” in your die cutting or embossing machine might not be exactly the same as mine.
What really helped me was using a silicone rubber mat (Stampin’ Up! no longer sells theirs, but you can still find them through Sizzix) along with the specialty plate. Those two made a huge difference in getting good results, so I’d definitely recommend using them if you decide to make your own embossing folders. Also, depending on the thickness of your die cut/punch layers inside your folder will determine how thick you’ll need your ‘sandwich’ for your die cutting/embossing machine (ie: using one vs two cutting plates, and/or the specialty plate, etc).
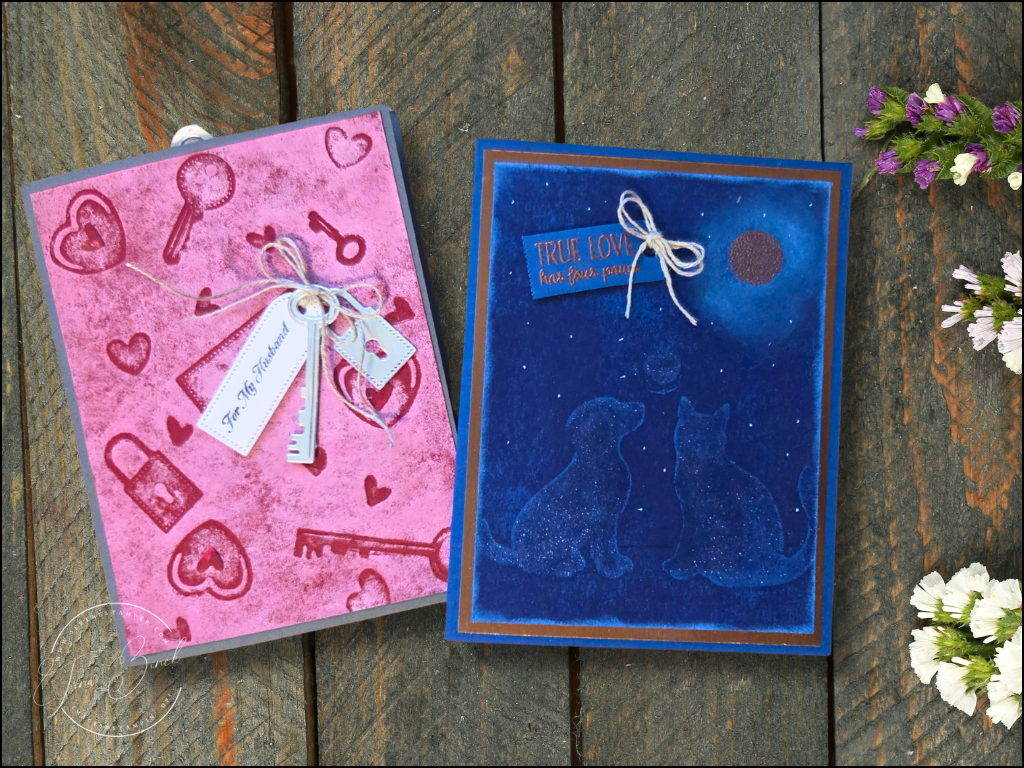
After I ran my cardstock through the folders, I added a layer of ink with my brayer – white ink over the Just a Note piece and Blueberry Bushel ink over the dog & cat piece. I absolutely love how this made the debossed images pop right off the paper! It’s such a simple little step, but it really brings out the detail and gives the embossing a whole new look.
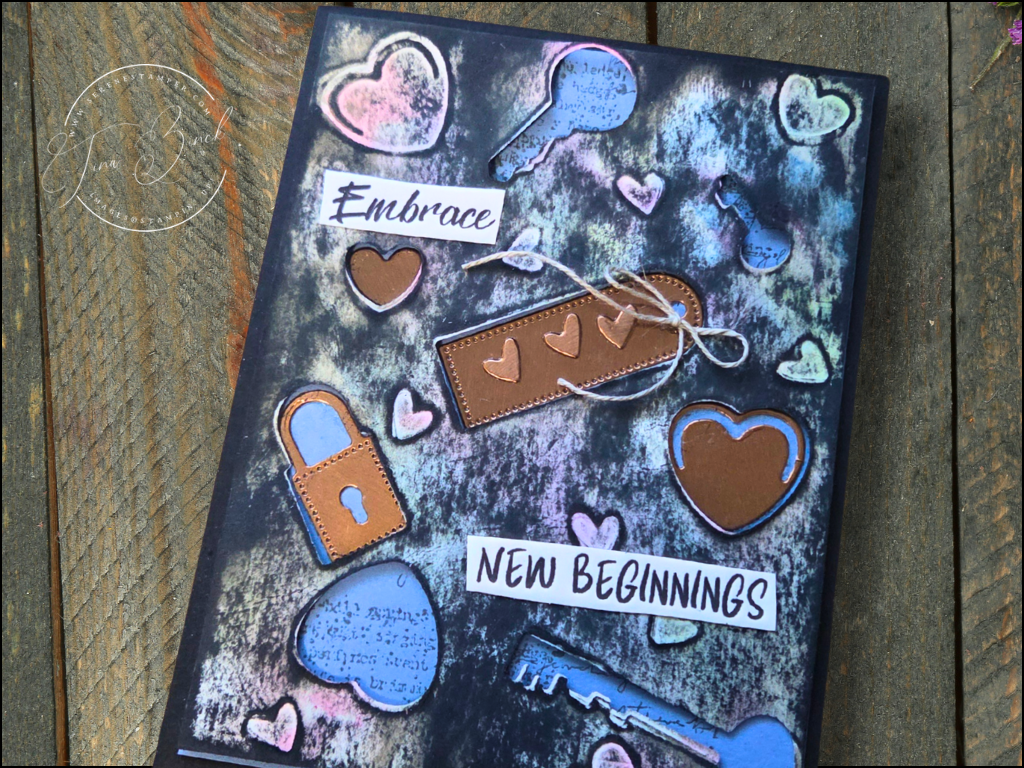
I also played around with a couple of inking hacks that you can try with your homemade embossing folders, and oh my goodness – they add such a fun twist! For the first attempt, I covered my DIY embossing folder with kitchen plastic wrap, scribbled Stampin’ Blends markers (alcohol ink) over top, spritzed with 70% rubbing alcohol, and then ran my paper through. It turned out okay, but not quite what I’d hoped for. So I tried it again with my Stampin’ Write markers (water-based) and spritzed the plastic wrap with water instead – shazam! Just the result I was looking for! And because the cardstock was damp from misting, the embossing came out even more pronounced.
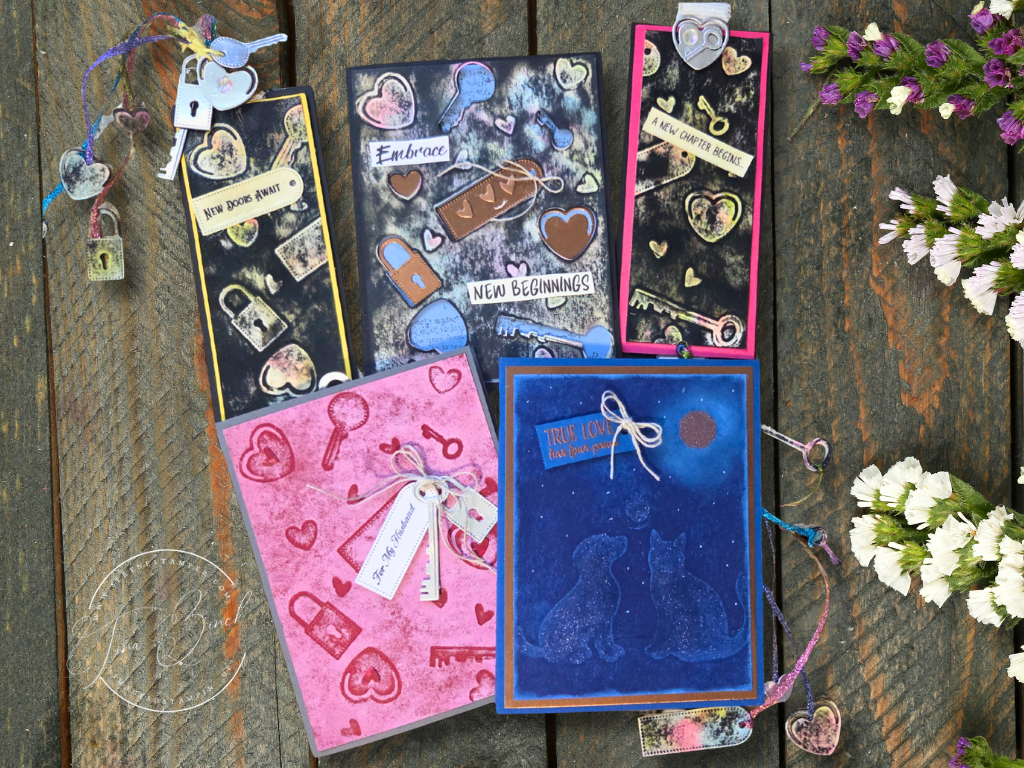
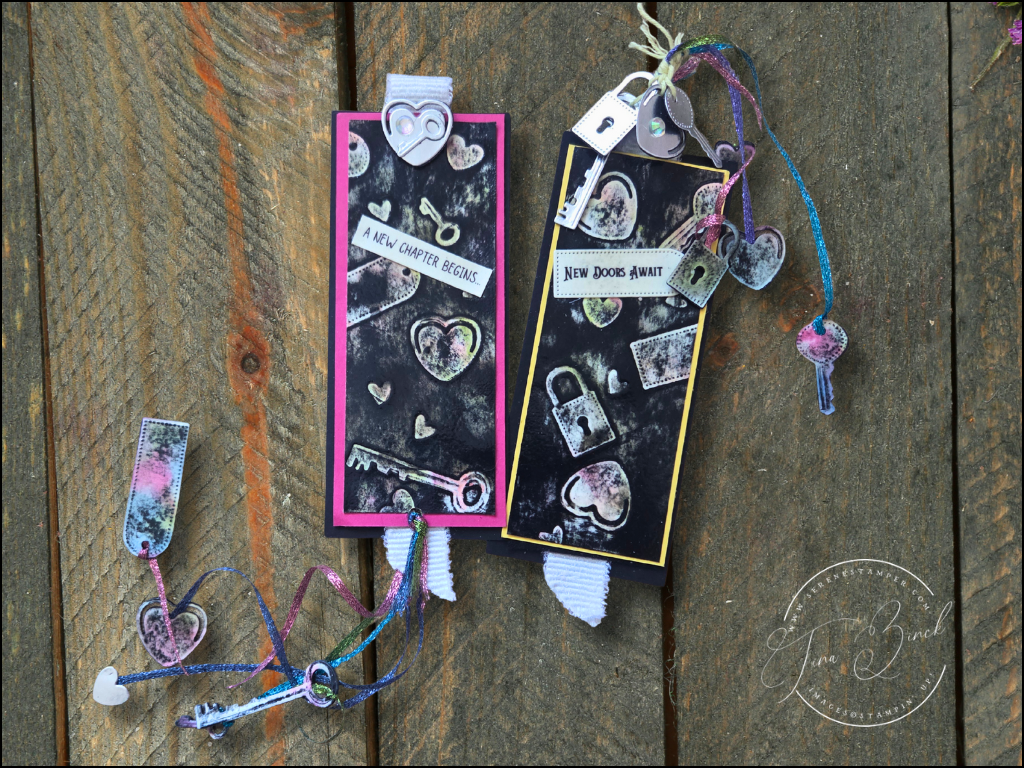
As a side note – I really should have been canning the bushel of cucumbers that’s been sitting on my kitchen counter … but nope. Once I started stamping I was happily lost in the creative ‘vortex’, and nothing was going to pull me out of it! HAHA! In the end, I combined all the techniques and used up bits and pieces on my desk to create another card and two bookmarks.
Honestly, I just had fun experimenting to see what would happen. That’s the beauty of this process – you never really know what you’ll get until you try it!
Here’s my video, demonstrating how I made my own embossing folders and all of today’s projects:
![Just A Note Bundle (English) [ 166102 ]](https://assets1.tamsnetwork.com/images/EC042017NF/166102s.jpg "Just A Note Bundle (English) [ 166102 ]")
![Just A Note Cling Stamp Set (English) [ 166098 ]](https://assets1.tamsnetwork.com/images/EC042017NF/166098s.jpg "Just A Note Cling Stamp Set (English) [ 166098 ]")
![Just A Note Dies [ 166101 ]](https://assets1.tamsnetwork.com/images/EC042017NF/166101s.jpg "Just A Note Dies [ 166101 ]")
![Tags To Go Bundle (English) [ 165577 ]](https://assets1.tamsnetwork.com/images/EC042017NF/165577s.jpg "Tags To Go Bundle (English) [ 165577 ]")
![Tags To Go Dies [ 165576 ]](https://assets1.tamsnetwork.com/images/EC042017NF/165576s.jpg "Tags To Go Dies [ 165576 ]")
![Tags To Go Cling Stamp Set (English) [ 165569 ]](https://assets1.tamsnetwork.com/images/EC042017NF/165569s.jpg "Tags To Go Cling Stamp Set (English) [ 165569 ]")
![Stampin' Cut & Emboss Machine [ 149653 ]](https://assets1.tamsnetwork.com/images/EC042017NF/149653s.jpg "Stampin' Cut & Emboss Machine [ 149653 ]")
![Multipurpose Liquid Glue [ 110755 ]](https://assets1.tamsnetwork.com/images/EC042017NF/110755s.jpg "Multipurpose Liquid Glue [ 110755 ]")
![Uninked Stampin’ Craft Pad & Whisper White Refill [ 147277 ]](https://assets1.tamsnetwork.com/images/EC042017NF/147277s.jpg "Uninked Stampin’ Craft Pad & Whisper White Refill [ 147277 ]")
![Stampin' Brayer [ 162936 ]](https://assets1.tamsnetwork.com/images/EC042017NF/162936s.jpg "Stampin' Brayer [ 162936 ]")
![Cherry Cobbler 8-1/2" X 11" Cardstock [ 119685 ]](https://assets1.tamsnetwork.com/images/EC042017NF/119685s.jpg "Cherry Cobbler 8-1/2\" X 11\" Cardstock [ 119685 ]")
![Basic Gray 8-1/2" X 11" Cardstock [ 121044 ]](https://assets1.tamsnetwork.com/images/EC042017NF/121044s.jpg "Basic Gray 8-1/2\" X 11\" Cardstock [ 121044 ]")
![Blueberry Bushel 8-1/2" X 11" Cardstock [ 146968 ]](https://assets1.tamsnetwork.com/images/EC042017NF/146968s.jpg "Blueberry Bushel 8-1/2\" X 11\" Cardstock [ 146968 ]")
![Blueberry Bushel Classic Stampin' Pad [ 147138 ]](https://assets1.tamsnetwork.com/images/EC042017NF/147138s.jpg "Blueberry Bushel Classic Stampin' Pad [ 147138 ]")
![Very Vanilla 8 1/2" X 11" Cardstock [ 166784 ]](https://assets1.tamsnetwork.com/images/EC042017NF/166784s.jpg "Very Vanilla 8 1/2\" X 11\" Cardstock [ 166784 ]")
![Basic White 8 1/2" X 11" Cardstock [ 166780 ]](https://assets1.tamsnetwork.com/images/EC042017NF/166780s.jpg "Basic White 8 1/2\" X 11\" Cardstock [ 166780 ]")
![Paper Trimmer [ 152392 ]](https://assets1.tamsnetwork.com/images/EC042017NF/152392s.jpg "Paper Trimmer [ 152392 ]")
![Metallics Wow! Embossing Powder [ 165678 ]](https://assets1.tamsnetwork.com/images/EC042017NF/165678s.jpg "Metallics Wow! Embossing Powder [ 165678 ]")
![Basics Wow! Embossing Powder [ 165679 ]](https://assets1.tamsnetwork.com/images/EC042017NF/165679s.jpg "Basics Wow! Embossing Powder [ 165679 ]")
![Heat Tool (Us And Canada) [ 129053 ]](https://assets1.tamsnetwork.com/images/EC042017NF/129053s.jpg "Heat Tool (Us And Canada) [ 129053 ]")
![Take Your Pick [ 144107 ]](https://assets1.tamsnetwork.com/images/EC042017NF/144107s.jpg "Take Your Pick [ 144107 ]")
![Basic Black 8-1/2" X 11" Cardstock [ 121045 ]](https://assets1.tamsnetwork.com/images/EC042017NF/121045s.jpg "Basic Black 8-1/2\" X 11\" Cardstock [ 121045 ]")
![Textured Metallic 12" X 12" (30.5 X 30.5 Cm) Specialty Paper [ 163772 ]](https://assets1.tamsnetwork.com/images/EC042017NF/163772s.jpg "Textured Metallic 12\" X 12\" (30.5 X 30.5 Cm) Specialty Paper [ 163772 ]")
![Clear Wink Of Stella Glitter Brush [ 141897 ]](https://assets1.tamsnetwork.com/images/EC042017NF/141897s.jpg "Clear Wink Of Stella Glitter Brush [ 141897 ]")
![Specialty Plate [ 154711 ]](https://assets1.tamsnetwork.com/images/EC042017NF/154711s.jpg "Specialty Plate [ 154711 ]")
![Stampin' Write Markers Collection [ 163136 ]](https://assets1.tamsnetwork.com/images/EC042017NF/163136s.jpg "Stampin' Write Markers Collection [ 163136 ]")
So there you have it – my first adventure with making DIY embossing folders, and I have to say, I had a blast. I hope this inspires you to give it a try too, because you never know what kind of creative magic will happen until you dive in and play. If you do, let me know – I’d love to see what you come up with!
I’ll be back later this week with some special news and another video for you – and trust me, you won’t want to miss this one. I had actually planned to share it with you today, but the frost we had this past weekend meant we had to pick all the veggies from our garden, which has kept me hoppin’ in the kitchen instead! I’ve been busy jarring and preserving everything- definitely not part of my original schedule for this week, but hey, Mother Nature had other plans, lol.
Take care & have a WONDERFUL day!


PS: I did manage to get my canning done last night after all – 15 pints of my favourite dill pickles! I think it’s safe to say I’ll be canning more than stamping for the rest of this week, LOL. In fact, as I’m typing this I’ve got my pressure canner filled with jars of potatoes, green beans and ham – our kitchen smells AMAZING!

Leave a Reply