Hi Friends! I hope you had a wonderful Christmas! Ours was quiet but lovely. Can you even believe that Christmas has come and gone and that we’re already a week into January? I honestly have a hard time wrapping my head around how fast the days seem to go. The last few months though, I’ve been making a very intentional effort to slow down and truly enjoy being present in the moment.
This past year was incredibly busy for me, and I’ll be honest — it was hard for me to stop & catch my breath (or even relax and read a book) without that nagging feeling that I should be doing something; WORKING on something. My to-do list was never-ending. Starting my new YouTube channel really helped me shift that mindset and practise what I’ve always believed to be true: that there is so much joy and peace to be found in the simple moments — all around us, and within us.

And as we begin this new year, that’s truly what I wish for you as well — a little more space to breathe, a little more joy in the everyday, and more time to enjoy the things that bring you peace.
With that spirit in mind, I’m trying something a little different today….

I’m trying out Ohuhu alcohol markers for the first time, and I’ll give you a little spoiler right up front — I absoluetly LOVE them!
Instead of focusing on traditional colouring techniques, I wanted to see what these markers could do in a different way. So today, I’m sharing three alcohol marker background techniques that are perfect for cardmaking, journaling, and mixed media projects.
If you enjoy experimenting, using what you already have, and letting the creative process guide you, this one’s for you.
Why Background Techniques?
Alcohol markers are most often used for colouring stamped images — and yes, they work beautifully for that. But I’ve always enjoyed pushing supplies a bit further and asking, what else can this do?
Using alcohol markers for backgrounds allows you to:
- Create depth and movement
- Use colour in a looser, more expressive way
- Make pieces that work across cards, journals, and mixed media
- Get multiple looks from a single background
This is where these markers really surprised me.
Technique 1: Alcohol Marker Ghosting (with Surface Prep)

This was my favourite discovery.
I coloured directly onto a surface that had been lightly sealed — using a thin wash of white gesso on regular cardstock and even on the cardboard backing that comes with Designer Series Paper packs. Once the colour was down, I misted a stamp lightly with 99% rubbing alcohol and pressed it onto the surface.
Instead of adding colour, the alcohol lifts it, leaving behind a soft, glowing ghosted image — no ink pad required.
Why this works so well:
- Creates an ethereal stamped look
- Adds interest without overpowering the background
- Perfect for layered card fronts and journals
Technique 2: Alcohol Marker Colour Transfer Printing
Here’s the fun bonus — after lifting the colour with your stamp, you can immediately press that same stamp onto another piece of paper.
The result is a secondary print, transferring the alcohol marker colour in an organic, almost watercolour-like way.
One background… two usable pieces.
This technique is wonderful for:
- Art journals
- Mixed media layers
- Abstract background panels
Technique 3: Stencilled Alcohol Marker Texture

For this technique, I created a loose rainbow background using the alcohol markers, then placed a stencil over top. Instead of flooding the surface with alcohol, I lightly misted it and pounced with a brush.
The result is subtle texture rather than harsh stencil lines — perfect if you like softer, layered effects. I finished these backgrounds with simple script stamping, which grounded all that colour beautifully.
Another super cool thing about this technique is that the residual ink and rubbing alcohol that’s left on the stencil can be transfered to another piece of card stock too! That’s what I did from when I created the background on the card shown above to make this card:

I also added some gorgeous washi tape from The Washi Tape Shop (you can click HERE and save 10% with my code SERENESTAMPER10). Paired with a touch of burlap texture and softly torn paper edges, these elements became the perfect finishing details for the design. I truly love how these two cards came together.
A Note on Ghosting (and Why I Did It This Way)
Ghosting isn’t a new technique. Many of us have created ghosted images using Distress inks and water, and there are also alcohol lift ink pads designed specifically for this effect (which I don’t currently own). Another common approach is stamping with white ink, which creates a soft, subtle ghosted impression on coloured backgrounds.
Traditionally, ghosting with alcohol-based products works best on specialty surfaces like glossy cardstock, Yupo, or other non-porous papers, where the ink sits on top long enough to be lifted.
The challenge for me was this — I wanted to use my alcohol markers on regular cardstock and work with what I already have in my craft stash.
That’s where surface prep comes in.

By applying a very light wash of white gesso, the paper becomes lightly sealed. This prevents the alcohol marker ink from soaking in immediately, allowing the colour to stay workable. When you mist your stamp with 99% rubbing alcohol and press it onto the surface, the alcohol doesn’t add colour — it lifts it, leaving behind that soft, glowing ghosted image.
This approach lets you:
- Use regular cardstock instead of specialty paper
- Work with supplies you already own
- Create ghosted effects with alcohol markers
- Get both a lifted image and a colour transfer print from one background

There are many ways to achieve ghosting, and each has its place. For this project, using gesso was the perfect solution for getting the look I wanted while staying true to my “use what you have” approach. I even incorporated both dry embossing and heat embossing using the techniques I’m sharing with you today. So. Much. FUN!

Why I’m Loving the Ohuhu Honolulu Markers
I’ve been stamping for over three decades, and I can honestly tell you that I’m super impressed by how these colours blend.

What stood out to me right away:
- Rich, juicy ink
- Smooth blending, even on altered surfaces
- A flexible brush tip that’s expressive and easy to control
- A generous colour range (the 120-colour set is a dream for backgrounds)
- Excellent value for the price point
Whether you’re cardmaking, journaling, or exploring mixed media, these markers offer a lot of creative freedom.
Watch the Full Video
If you’d like to see all three techniques step-by-step — including the unboxing, swatching, and finished cards — you can watch my video here:
Save on Ohuhu Markers
🎁 Limited-Time Discount
You can save 10% on Ohuhu markers using my code:
CODE: SERENE10
👉 Shop Ohuhu: https://www.ohuhu.com
Some links may be affiliate links, which means I may earn a small commission at no extra cost to you.
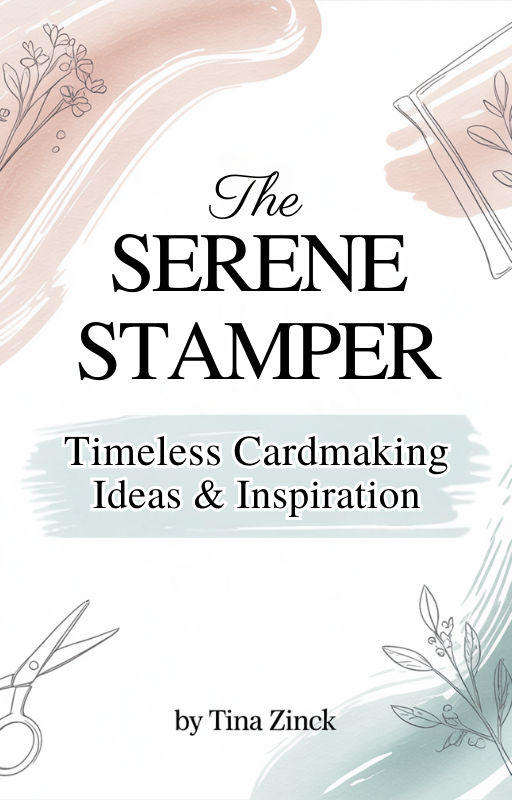
A Bit of Exciting News from My Craft Room
Over the holidays, I quietly launched two new eBooks for card makers and stampers.
With everyone so busy at that time of year, I didn’t make a big announcement. I simply added them to my Fourthwall shop (the little shelf you see underneath my YouTube videos).
These resources were created to help you:
- Get more ideas from the supplies you already own
- Feel less stuck when you sit down to create
- Enjoy the creative process without overthinking it
I’ve been working on my Cardmaking Ideas & Inspiration Book for a long time and truly poured my heart into it. Over the years, so many of you have asked about layouts, colour combinations, and where to start when you sit down to create. I wanted to gather all of that into one easy-to-use resource you could keep right at your fingertips.
I’ve also created a Fix-It Guide for Card Makers, designed for those moments when a card just isn’t coming together.
If you’d like to take a look, I’ll link both resources below:


Today’s cards & projects was such a good reminder of why I love creative play. When you stop worrying about doing things “the right way” and start asking what happens if…, that’s when the magic really shows up.
If you try any of these alcohol marker background techniques, I’d love to hear how you use them — on cards, in journals, or somewhere completely unexpected.
Take care & HAPPY STAMPING!

This video was incredible!!! I actually have a small pack of Yupo paper to try these techniques on, too. Once again, you’ve pushed me to try something new, Tina. On my own, techniques aren’t something I do and so I follow you to stretch myself creatively. Thank you!
Hi Nicole! Well, thank you SO MUCH – what a wonderful comment! I really appreciate your kind words and please let me know how you make out with these techniques and your yupo paper!!! HAVE FUN! xoxox